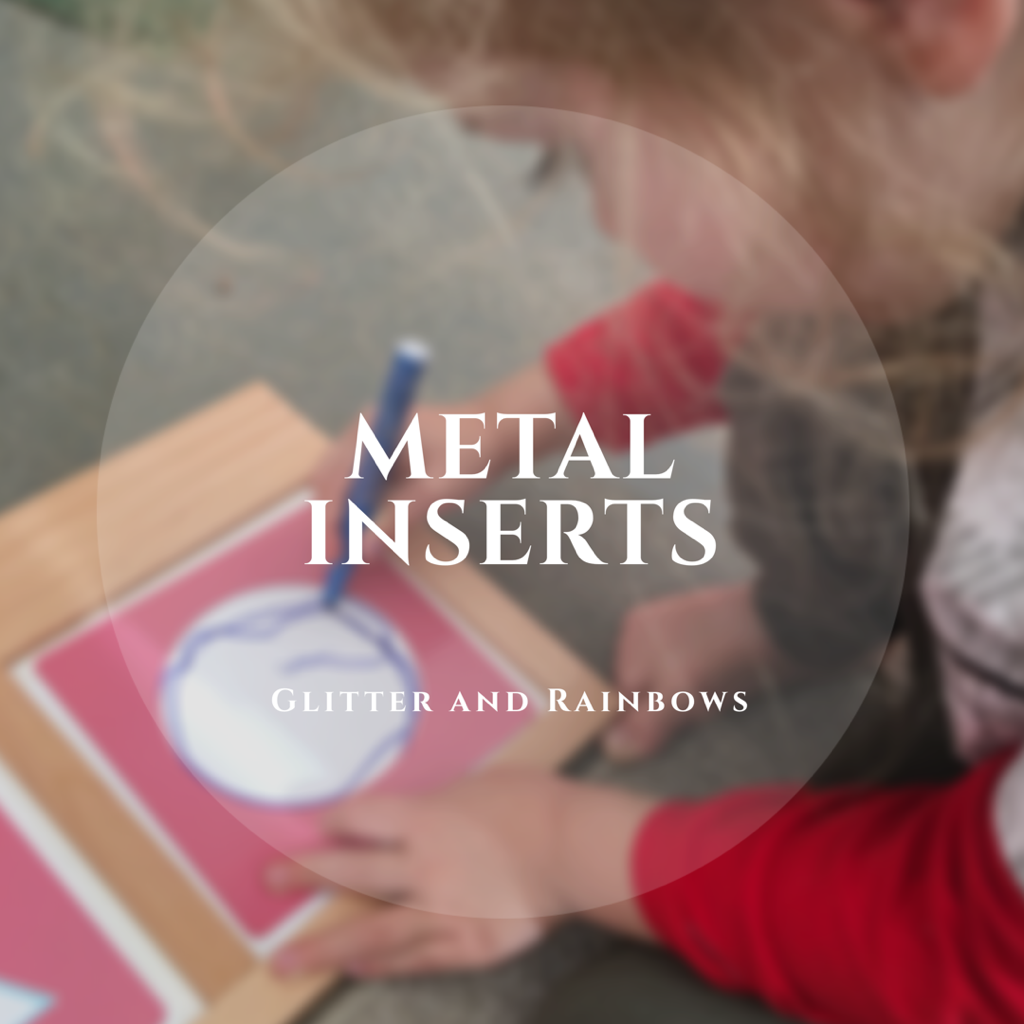
 Today was a sick day for A. So we cuddled on the couch and watched ABC kids. I’ll admin we watched YouTube too. I was pretty tired. A said, ‘We’re busted Mum.’ Yep. We did play some and did some ‘shelf games’ which is what we call the stuff on our Montessori shelves, but most importantly I introduced the metal inserts.  Our set arrived last Friday with some of the other Montessori materials we had ordered. I set out one of the shelves, but I was unsure if we should start using it yet. A was attracted to the shapes as a puzzle so I left it at that. I have been watching ‘Alison’s Montessori Writing Workshop’ pr wanted by Susan Scheibenzuner on YouTube and among other great tips, she spoke about children using the metal inserts at their level - having their own experience - and using felt pens. 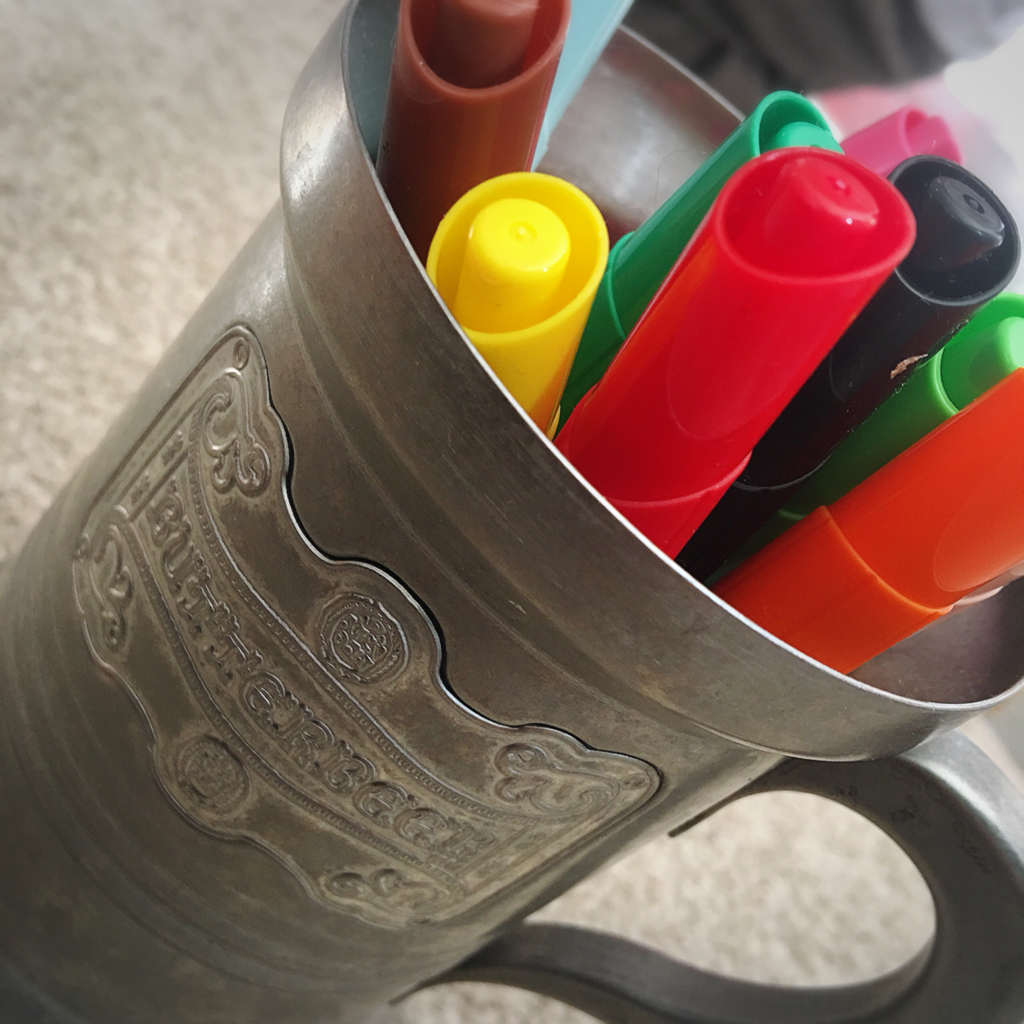 So I got out the tray, the paper box and presented our new pens in my butterbeer mug that I got from Japan’s The Wizarding World if Harry Potter. 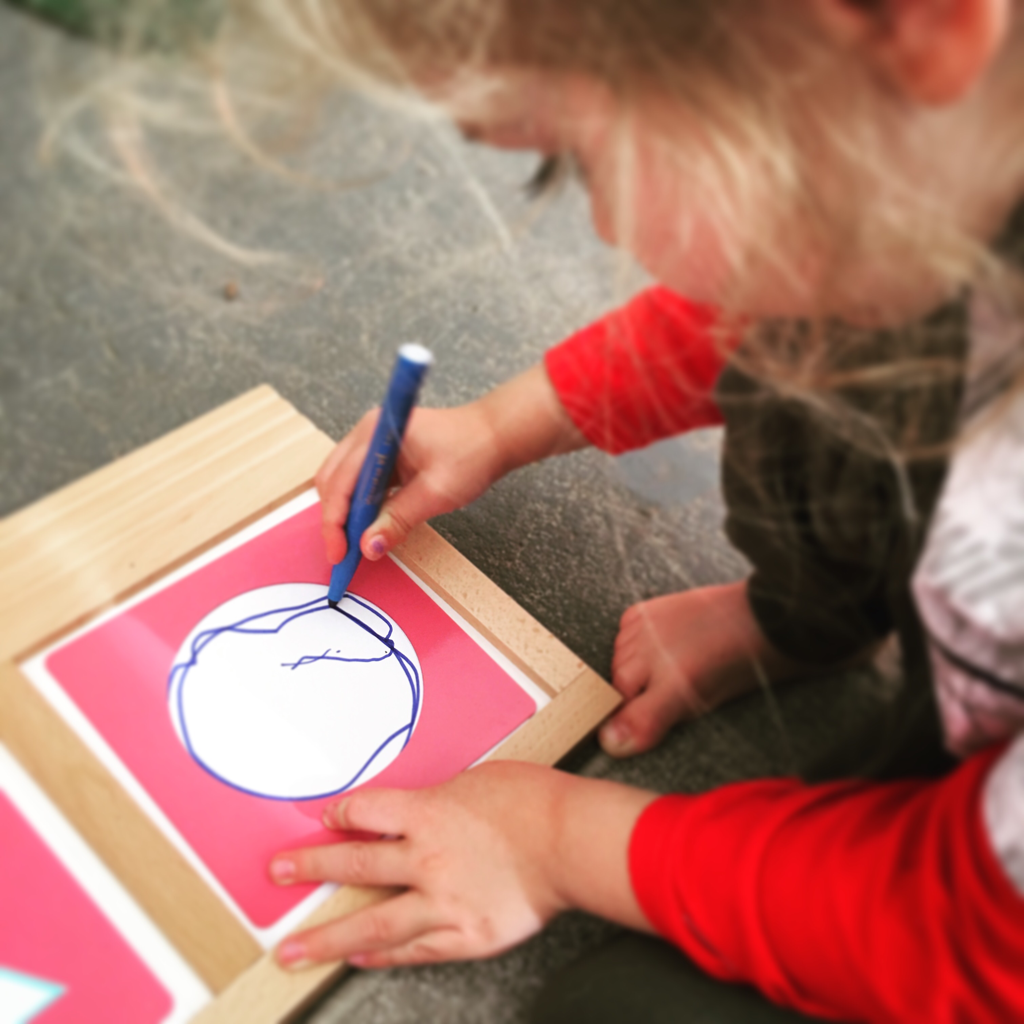 I showed him how to place paper in the tray, then select a shape frame. We took it over to a mat and then I showed him how to use the pen to draw within the frame. Then he went to town! 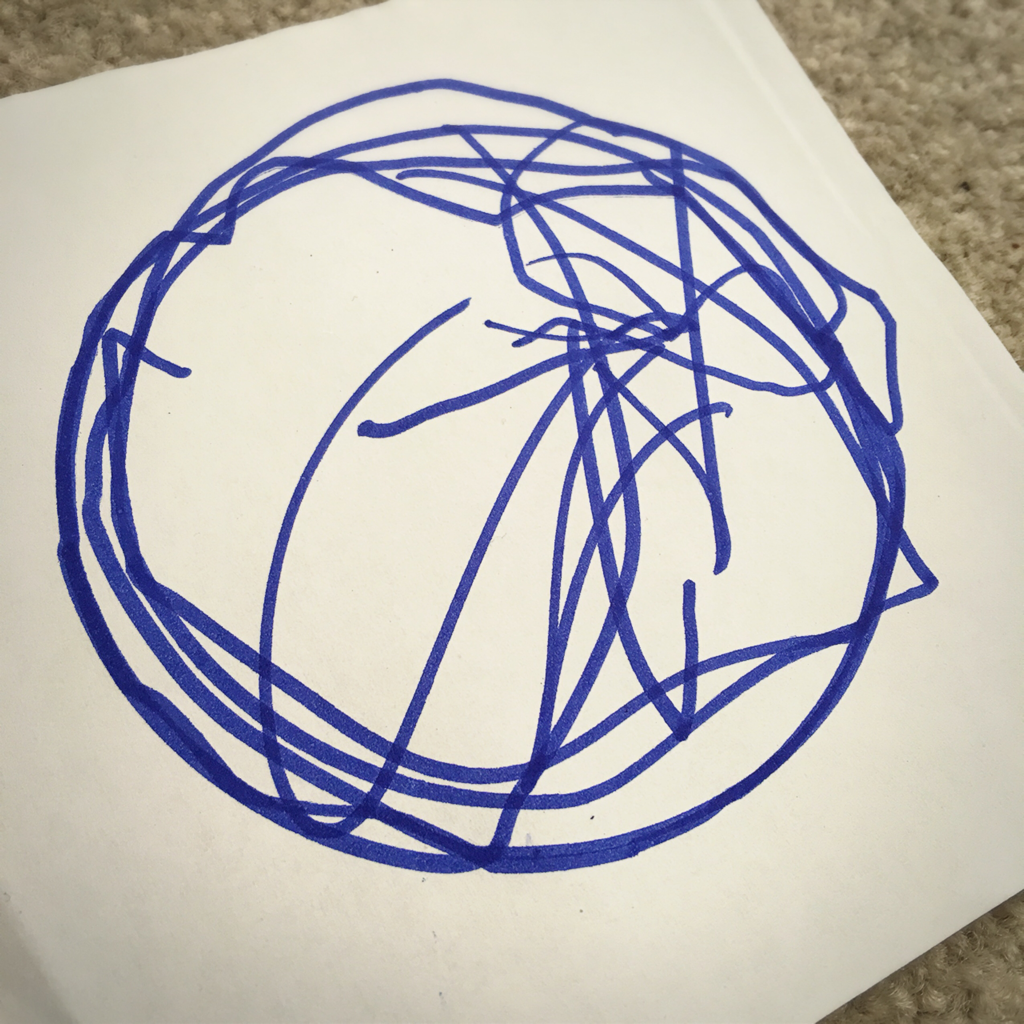 We have sticky taped the shapes up above our new metal insert area. I’m hoping he will want to go back to this work because it is pretty awesome! 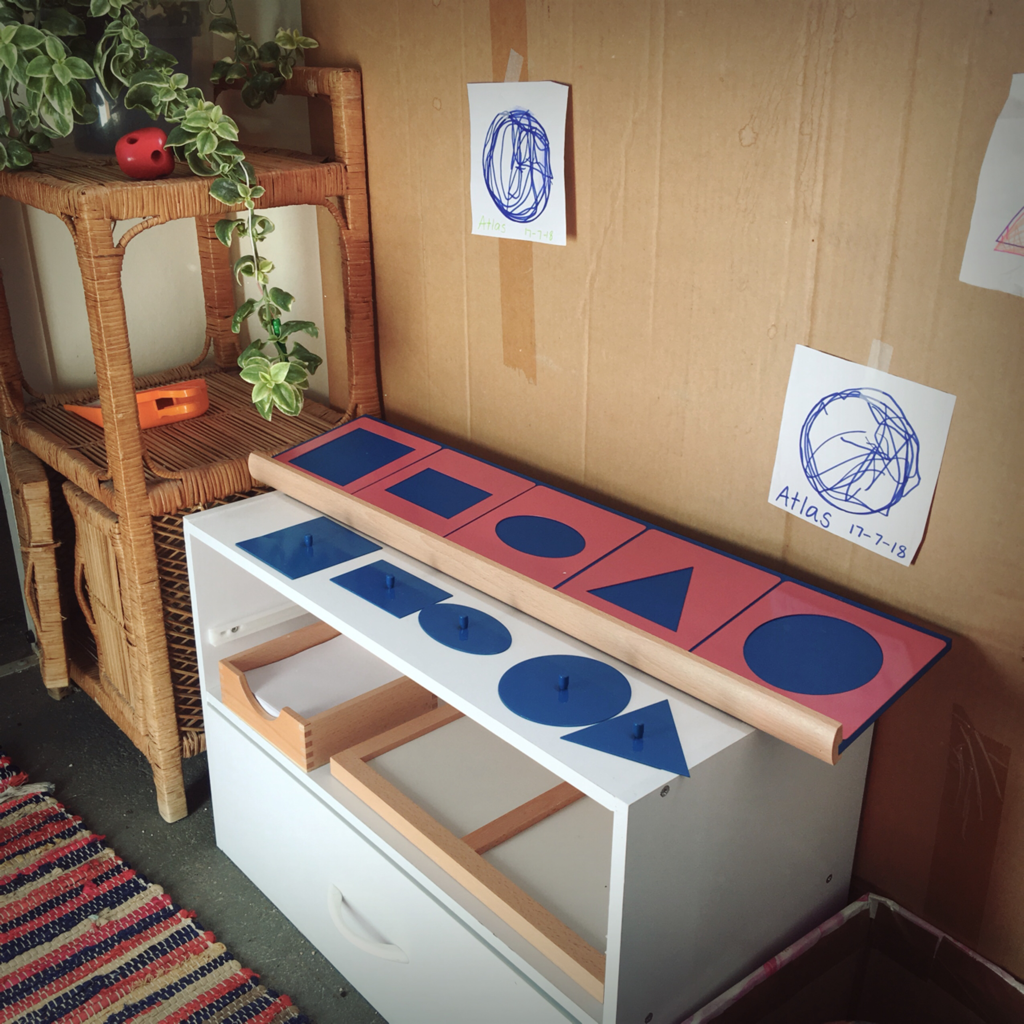
0 Comments
 A turned 3 recently. It was a pretty low key event. As I am on school holidays he got to stay at home. 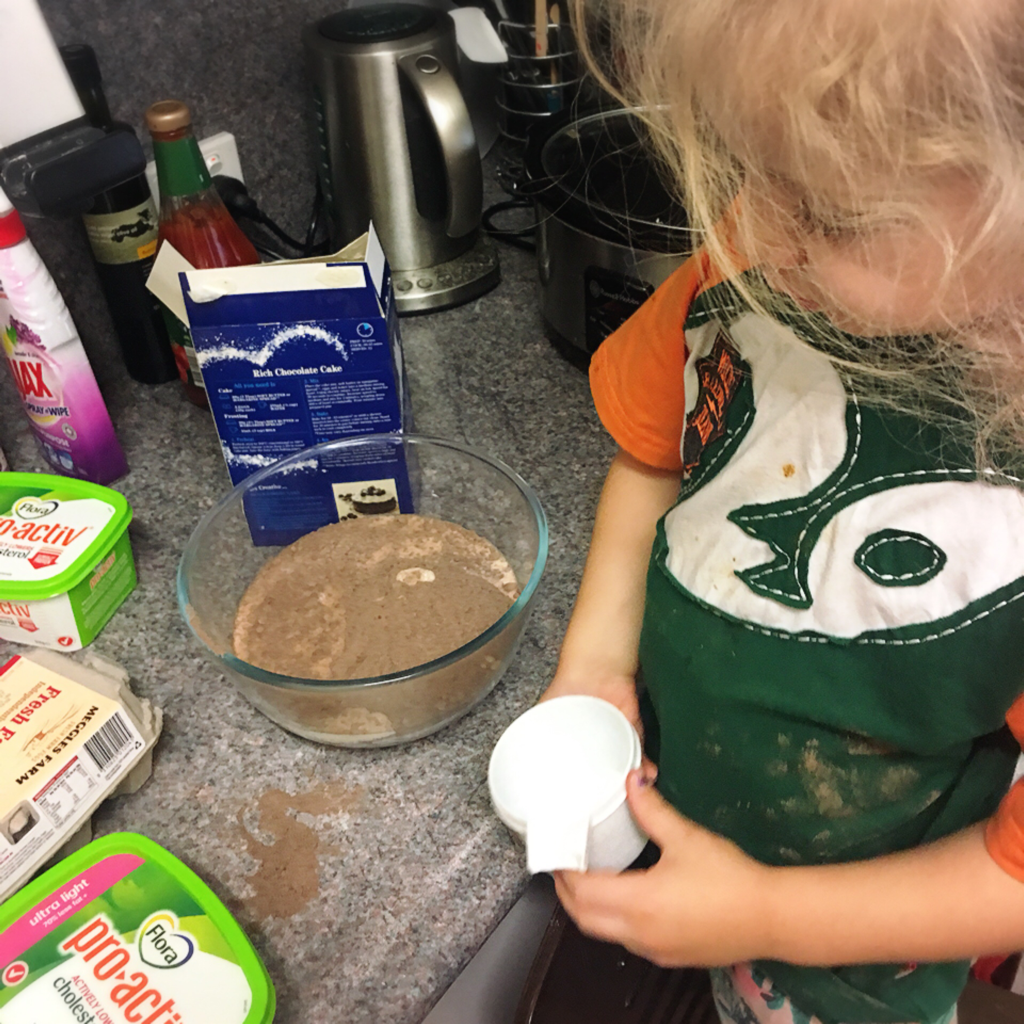 We slowly gave him all of his presents during the day, we went to the library, and met up with a friend at the park. 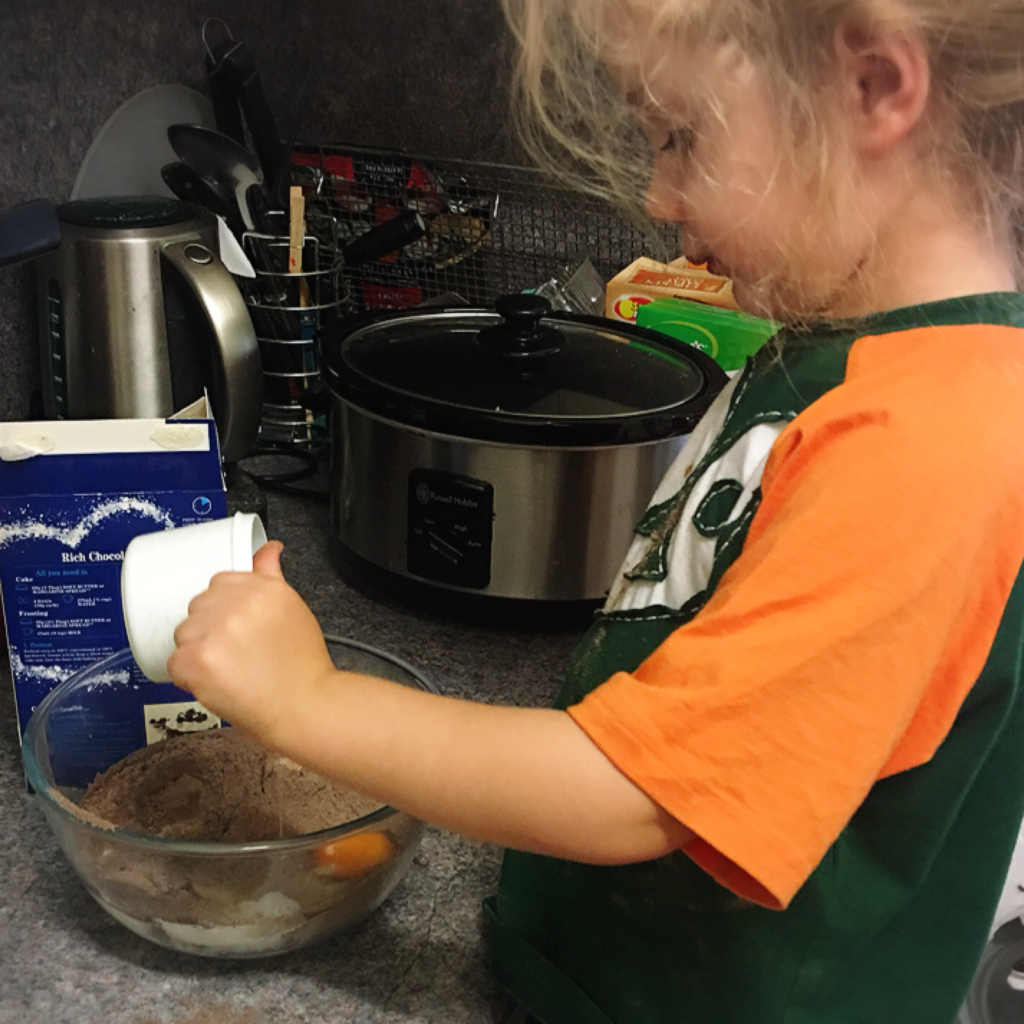 He made his own cake. Two actually. Both packet ones but 🤷🏼♀️ 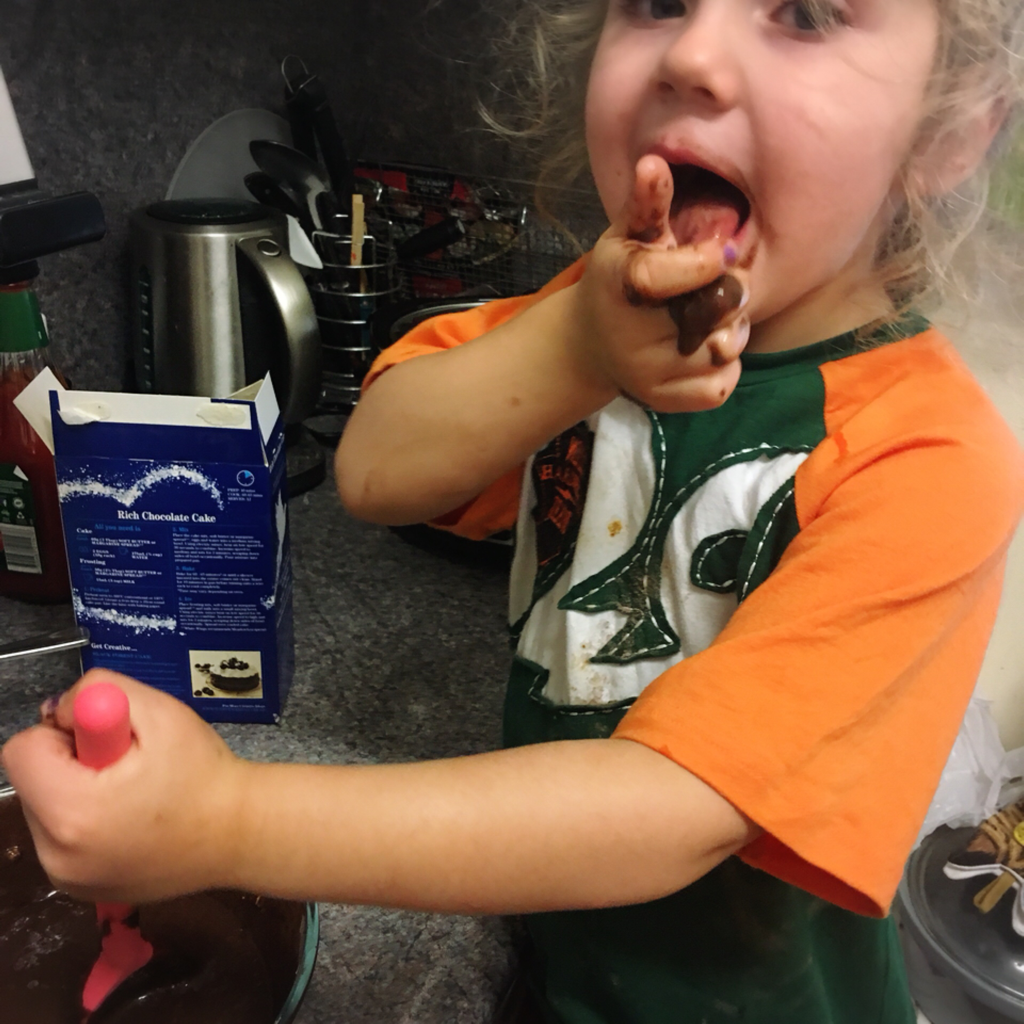 The first cake was a rich chocolate cake. It was delicious. He iced it with pink icing but it wasn’t the prettiest cake. You see it didn’t come out of the pan... whole. In fact it was just a pile of crumbs.   The second cake we made on the weekend so we could have it for our poetry morning tea. It had to be blue 😂  The final cake is actually a wooden from for Kmart. It was a special birthday present from A’s friend K.   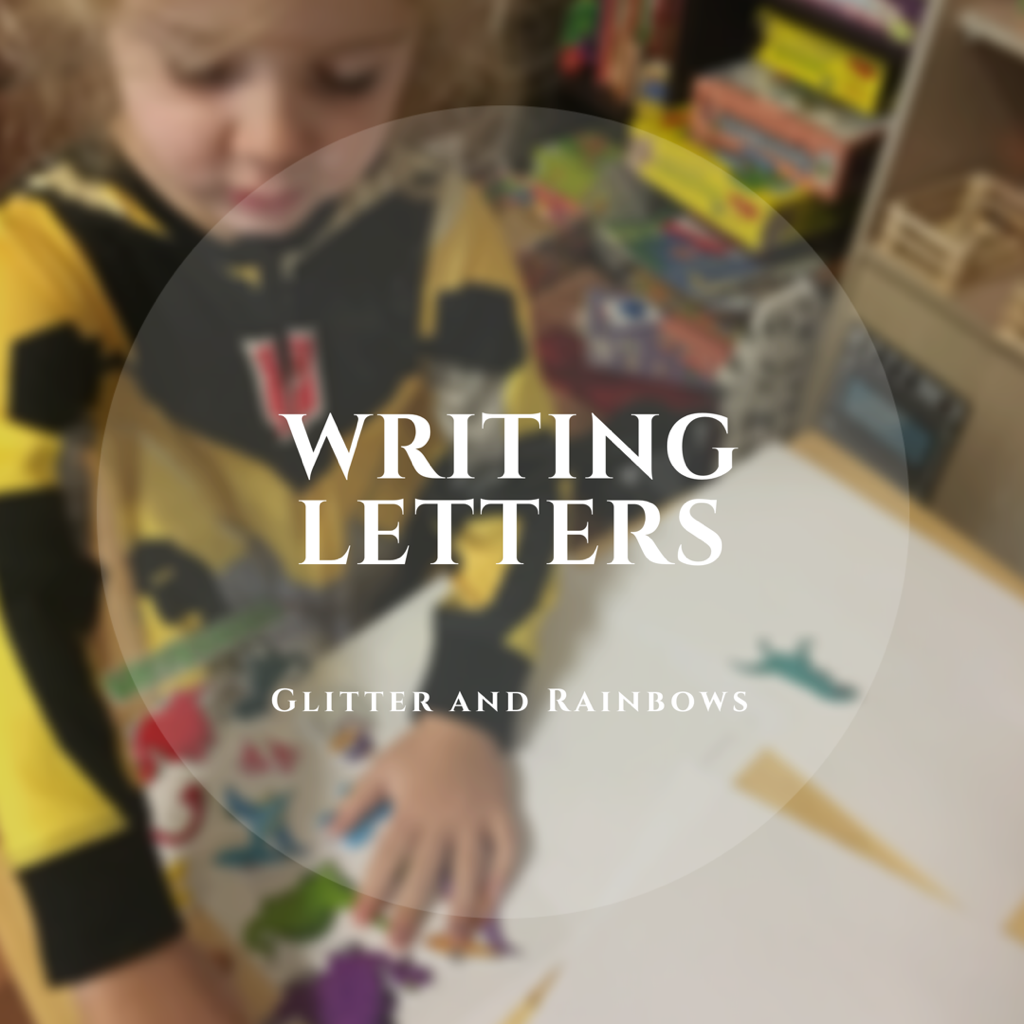 Just a short post today about posting! A wrote letters to aunties and grandmothers today. He drew pictures and used stickers!  Look at that concentration! 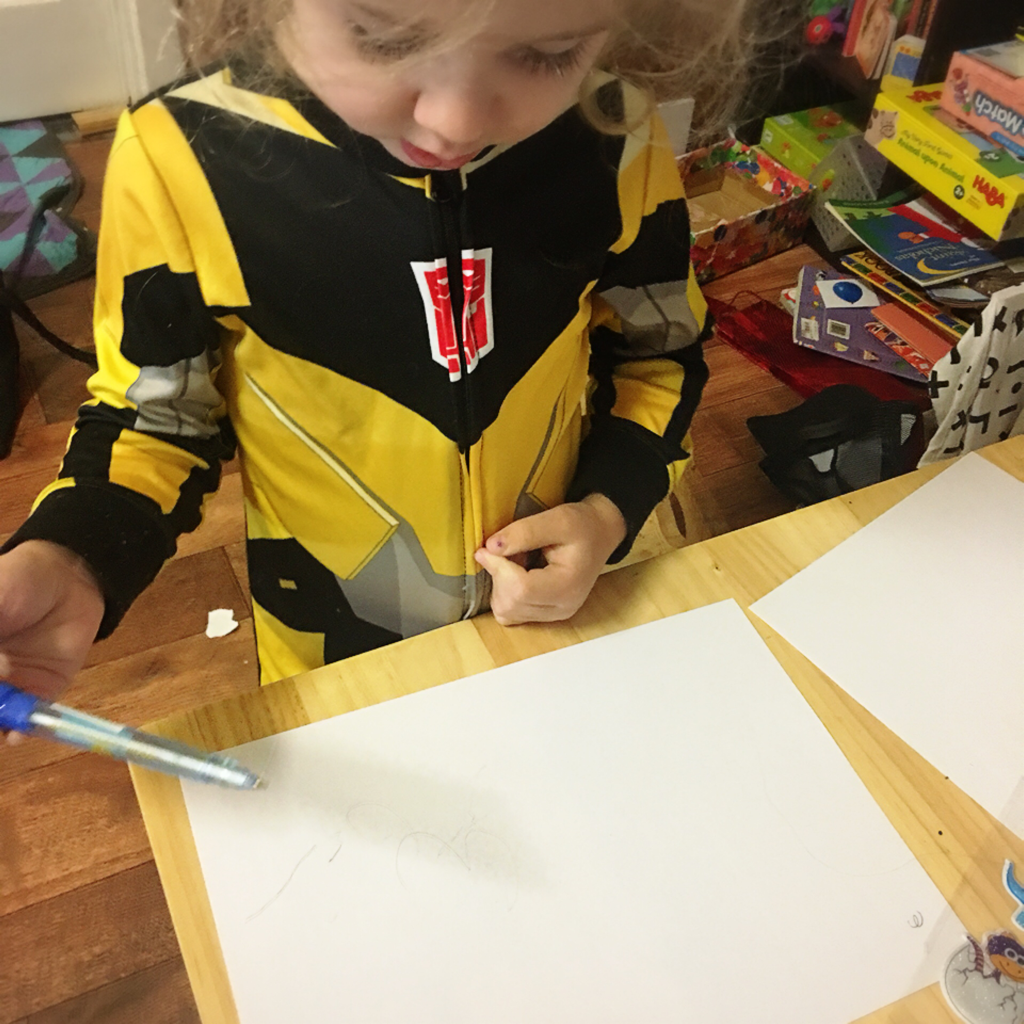 We then walked down to the post office where A paid for stamps. He then put the stamps on the envelope with a little bit of help, and then we popped them in the postbox! Sorry I didn’t get photos of all of that though! We were too busy to get out the phone and take photos. Sending letters is serious business! I prefer when we can actually do practical life activities in real life. 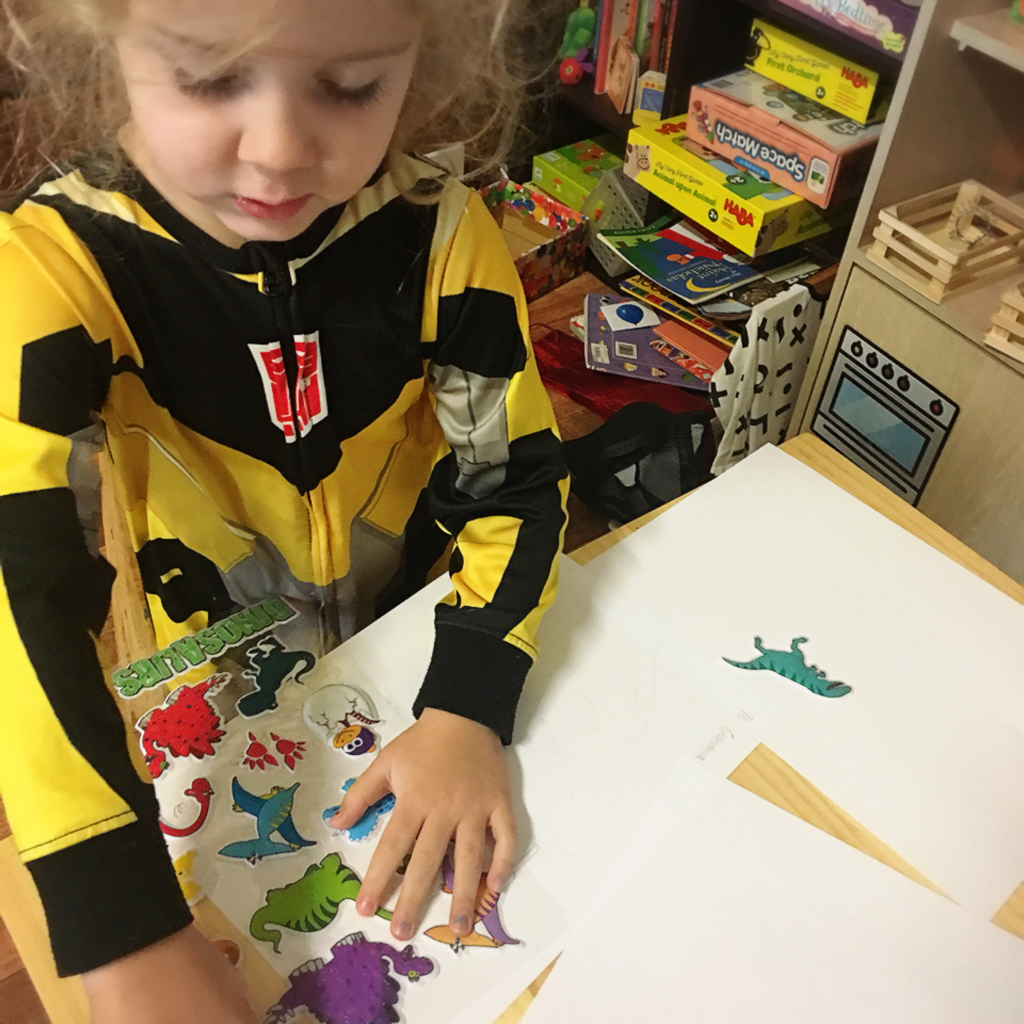  A while ago I saw an image on Pinterest (that didn’t seem to go anywhere) of a beautiful set of wooden disks. The disks had a number written in them and jewels stuck around the number. I knew I had to make them myself. 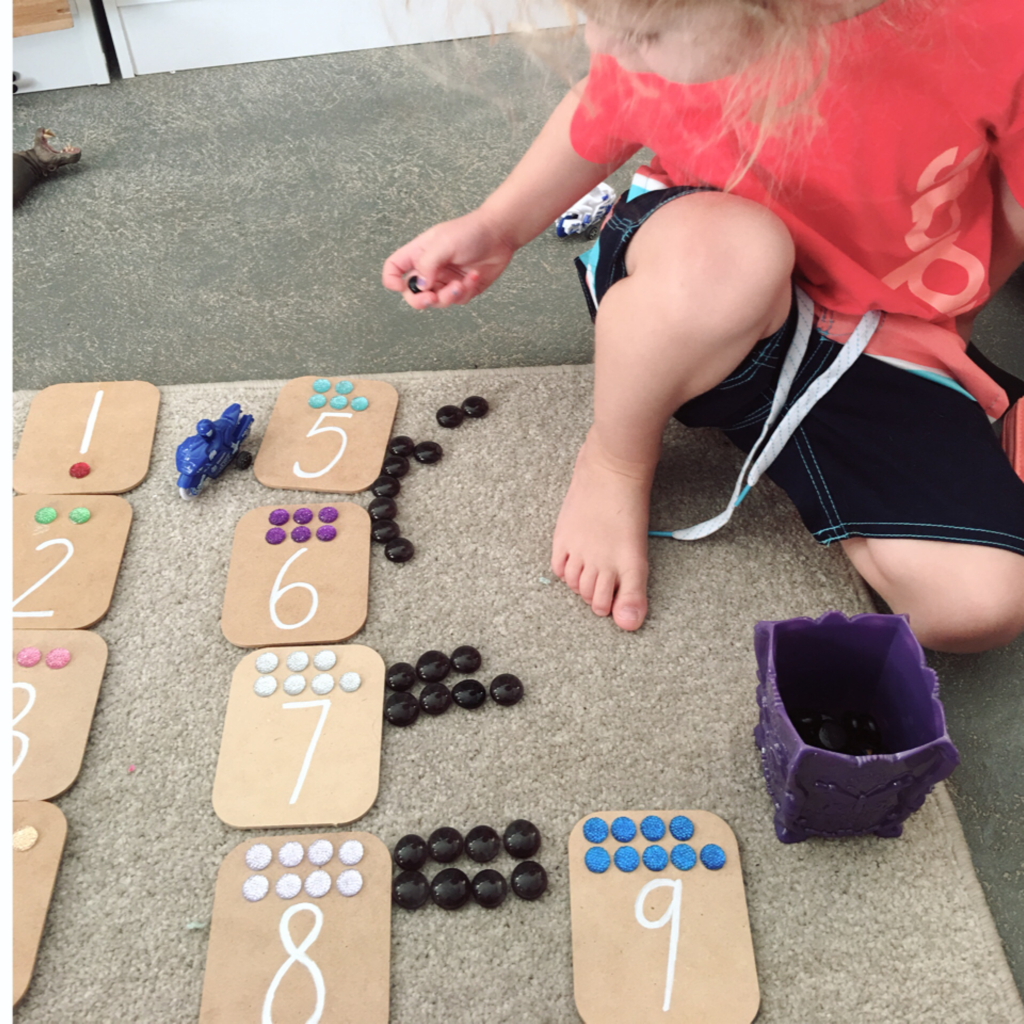 I used these coasters from Spotlight. Man I need to stock up on more of those! I keep finding ways to use them. I drew in the numbers with a paint pen. 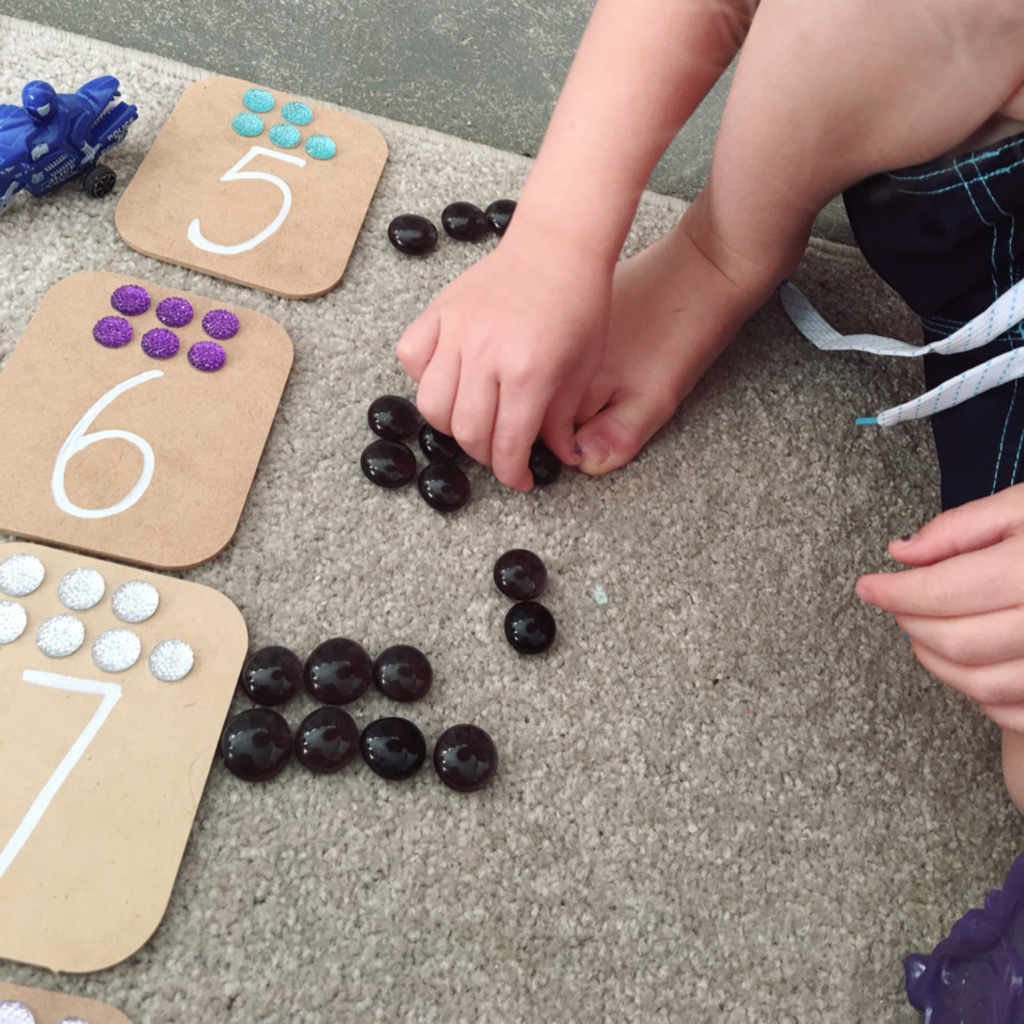 Then I glued in the jewels. I tried to stick to the Montessori colours for each number except for the number 8. There weren’t any brown jewels. I was thinking about using a brown Sharpie pen and colouring them in but I want to test it first. 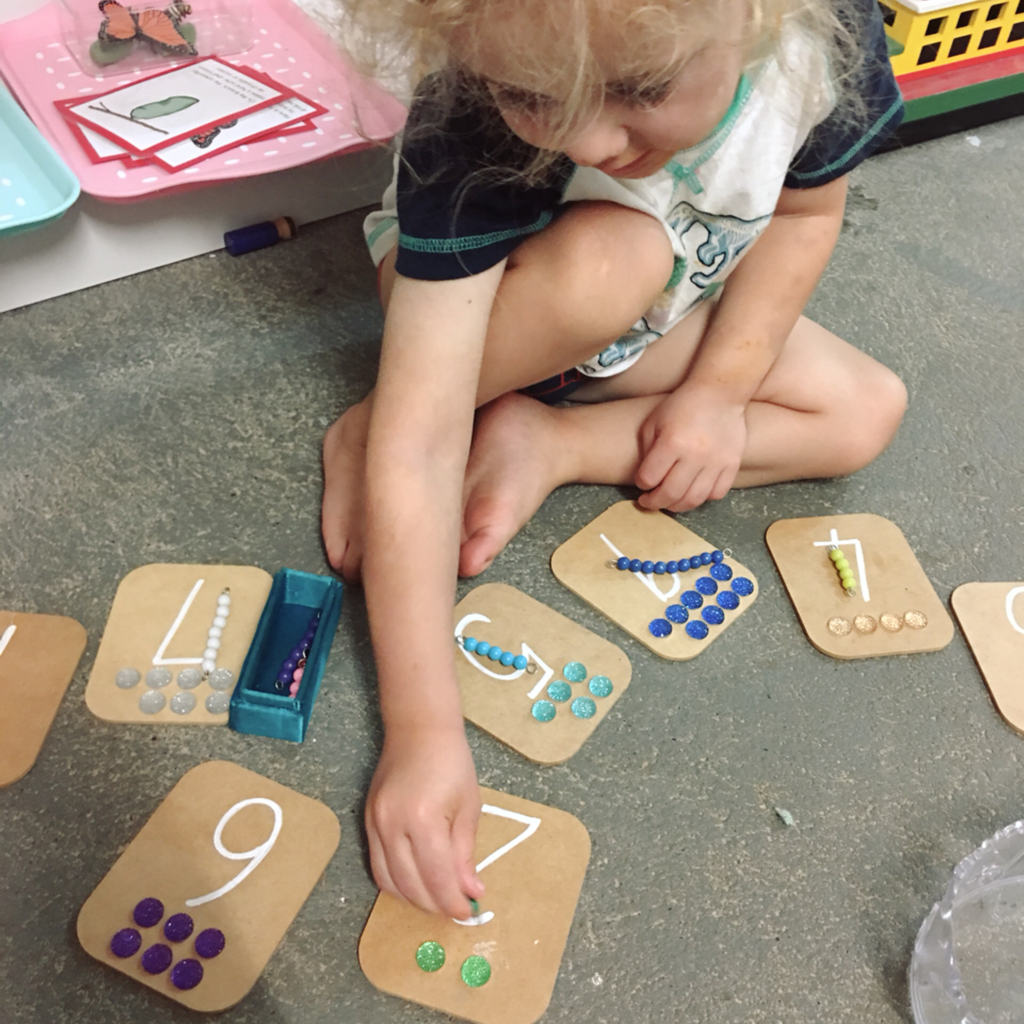 Another regret was that I didn’t really think about how I was glueing them on and really want to redo the first few. The later boards line the jewels up so that you can see if the number is odd or even. I like that. I also wanted to use some glitter glue on top of the numbers for a little more bling and texture but when I tried it, it looked terrible, so I wiped it off. I think it was because I used gold glitter which looked too yellow against the white number. 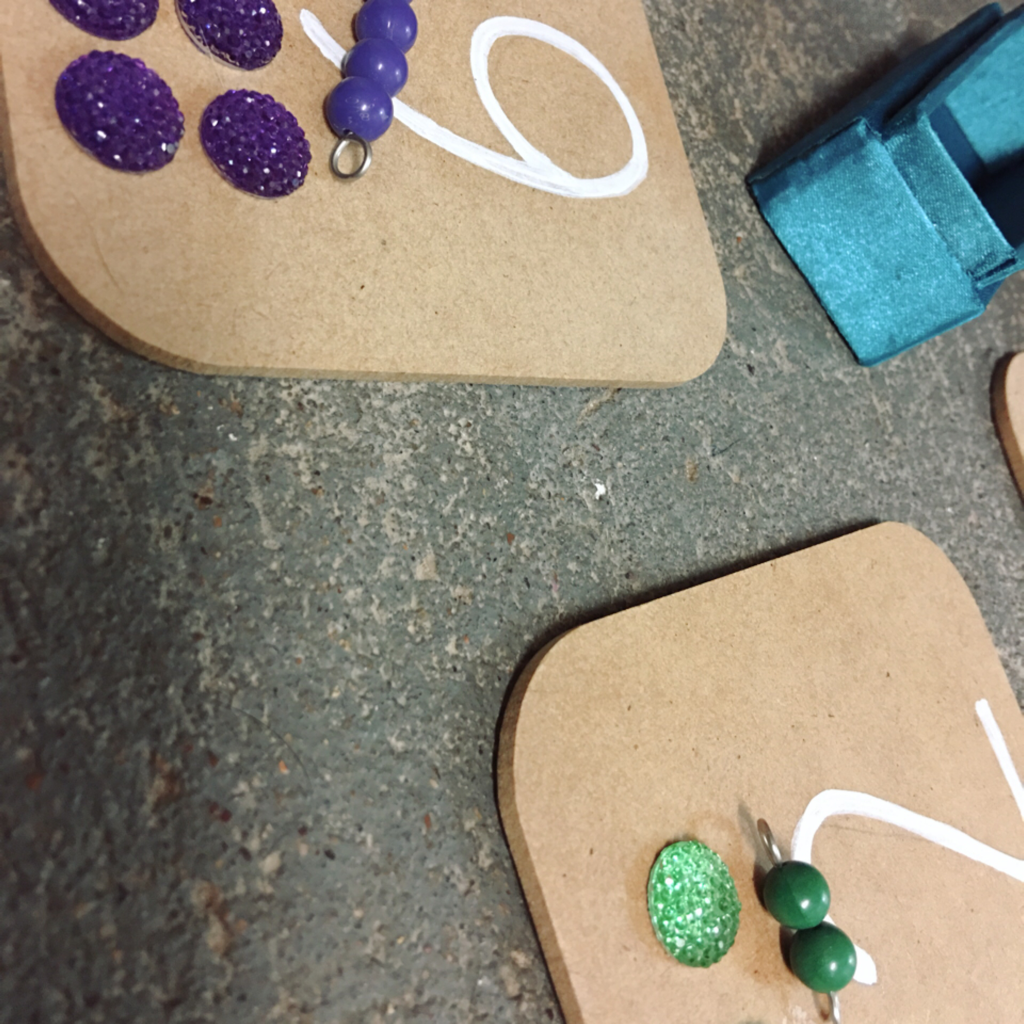 A has played with these a few times now. They are very pretty and tactile. He has paired them up with the Montessori bead stair in the past, but at the moment we have been using a heap of glass pebbles. 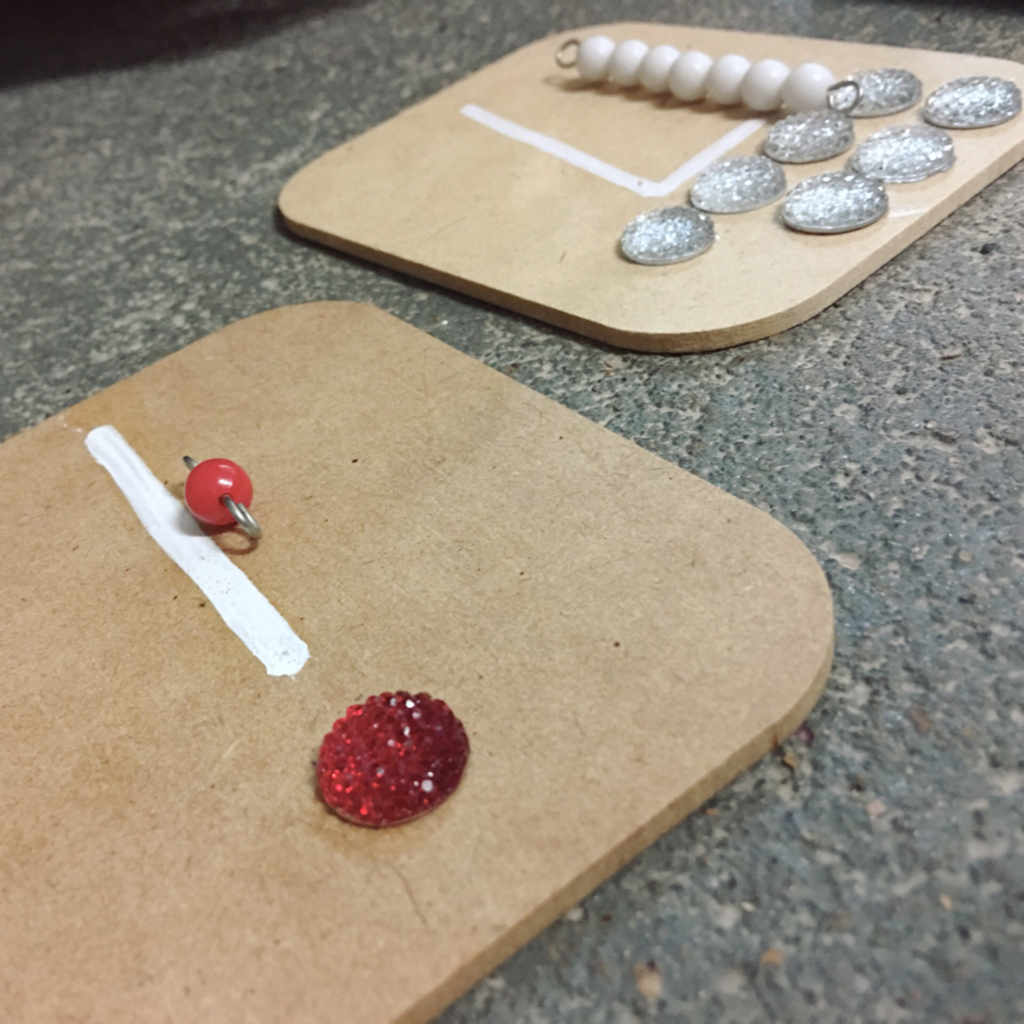 At the moment I have been counting out the bead and recreating the shapes on the card, whereas A likes to line up the pebbles and count them. I think it’s pretty cool that A is hearing counting and seeing the numbers along side their amounts. 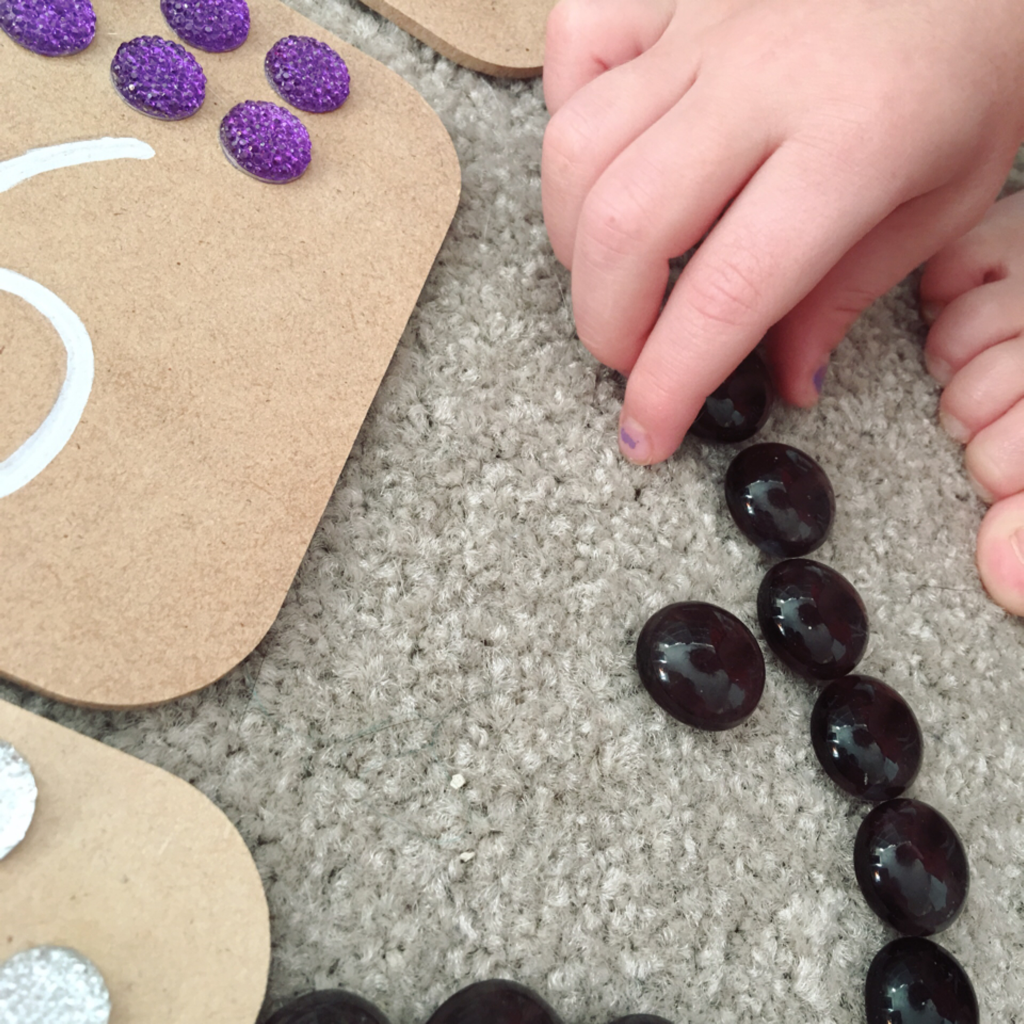 I’ve tried to get A to use a pair of tongs to pick up the pebbles but be hates that sort of activity. I don’t really blame him because there are easier ways of picking up small things. This is one area of Montessori Practical life where we fail! I see all these great activities where kids use different types of tweezers or tongs to complete the tasks bu I know that A would not do them. Oh well, follow the child!
 This isn’t my normal sort of post. I’m going to talk about my hair. I have mermaid hair and I don’t care. It isn’t really professional but students love it. Most people seem to. The question I get asked the most is, ‘Can I touch it?’ Sure if I know you. The second most popular question is, ‘How do you do that?’ And the third is, a statement, ‘That must cost a lot.’ 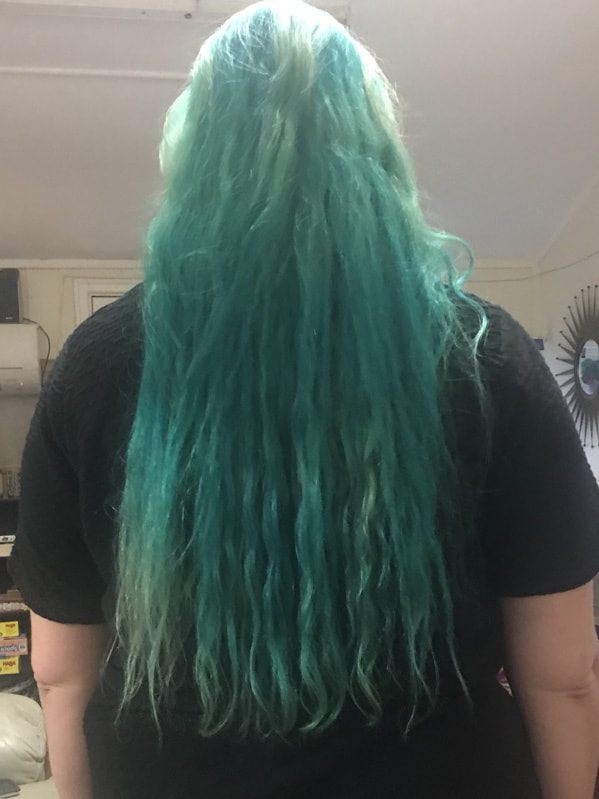 I have (very) long hair. It’s past my waist. So yeah, if I went to a hair dressers and got this done it easily costs $300. However I only visit a salon once a year. The rest of the time my husband does it. This photo was from last week so you can see how faded I let it get.  Supposably you are meant to bleach the roots every 6 to 8 weeks but I actually wait 10, once a term during the school holidays. Sometimes I will put colour through during the term if something special is happening, but otherwise I just let my roots show and some of the hair gets yellowy. You can see this in the above photo. We use vol.20 bleach and powder that we buy in bulk from a chemist in bulk. We use such a low number so it is more gentle in my hair, although it takes longer to get there. This is as pale as I bleach my roots. The flesh of a banana. However because I use such a dark and intense colour over this I usually bleach it to the colour of banana skin 🍌. I took it back this far today just to show you. Oh the things a blogger will do.  I use Manic Panic, a mix of two colours - Enchanted Forest and Atomic Turquoise. The Enchanted Forest by itself runs for months, and I end up blue every time I shower. I actually like Atomic Turquoise by itself but I wanted my hair to be more teal.  Above is Atomic Turtoise after I first got it put in by a real hair dresser. I think the hair dresser lied though and mixed in a bit of other colour to make sure she had enough to cover all of my hair. Hair dressers seem to underestimate how much hair I have. It’s fine, but there is so much of it!  It’s actually very pretty but it fads quicker then my current mix. 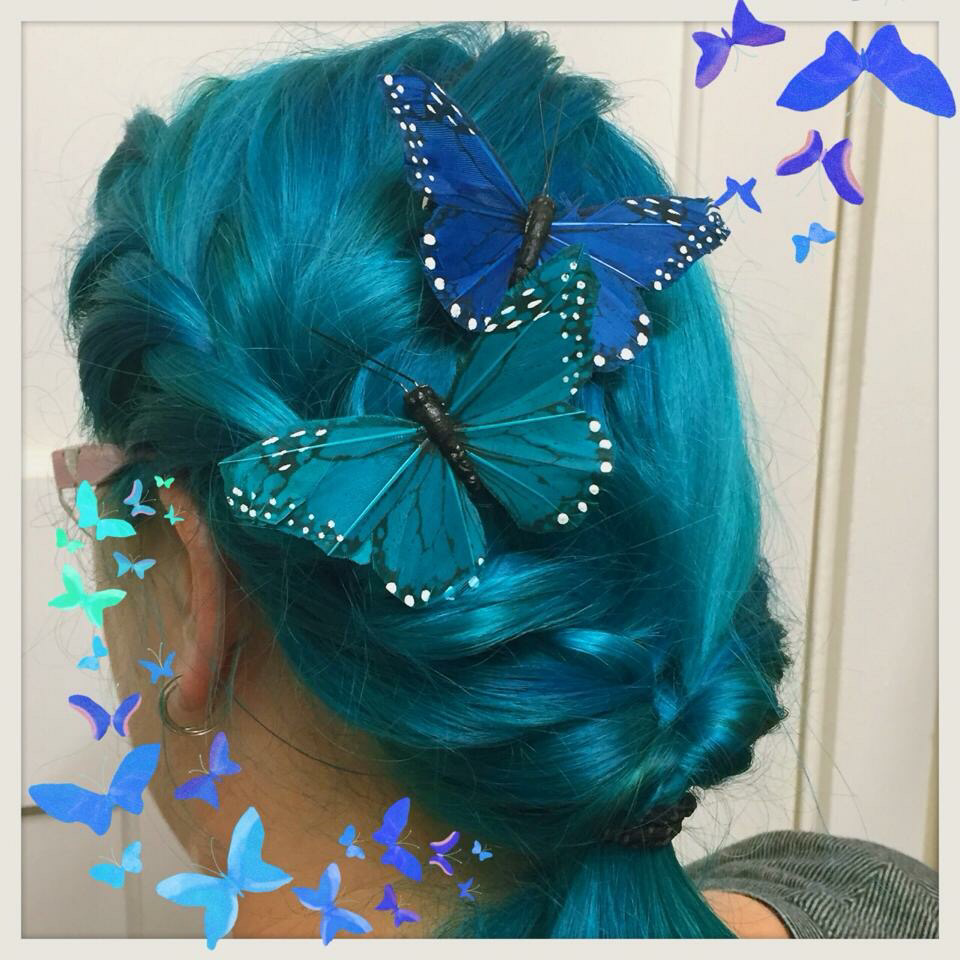 I only wash my hair once a week. During the week I use a dry shampoo, or I wear it up. To be honest my hair doesn’t seem to get dirty or oily because if I’m not washing away the natural oils then my hair sorts itself out. The photo below is as ‘oily’ as it gets, nothing a little dry shampoo can handle.  I use whatever colour shampoo and conditioner is on sale. I buy double the amount of conditioner. I use only a small amount of shampoo for my scalp, and when I rinse the suds out I let it run over the length of the hair. I then condition it all. This ensures the hair scales flatten back down and hold the colour again. Let’s put it this way, when I shampoo my hair the water at the bottom of the shower is bright blue, as soon as the conditioner goes on it will run clear. I rinse and then I condition again, but this time I will leave enough of the conditioner in to leave my hair feeling slick, and this time avoid the roots of my hair. I usually air dry, and finger comb or use a wide toothed comb when my hair is damp. 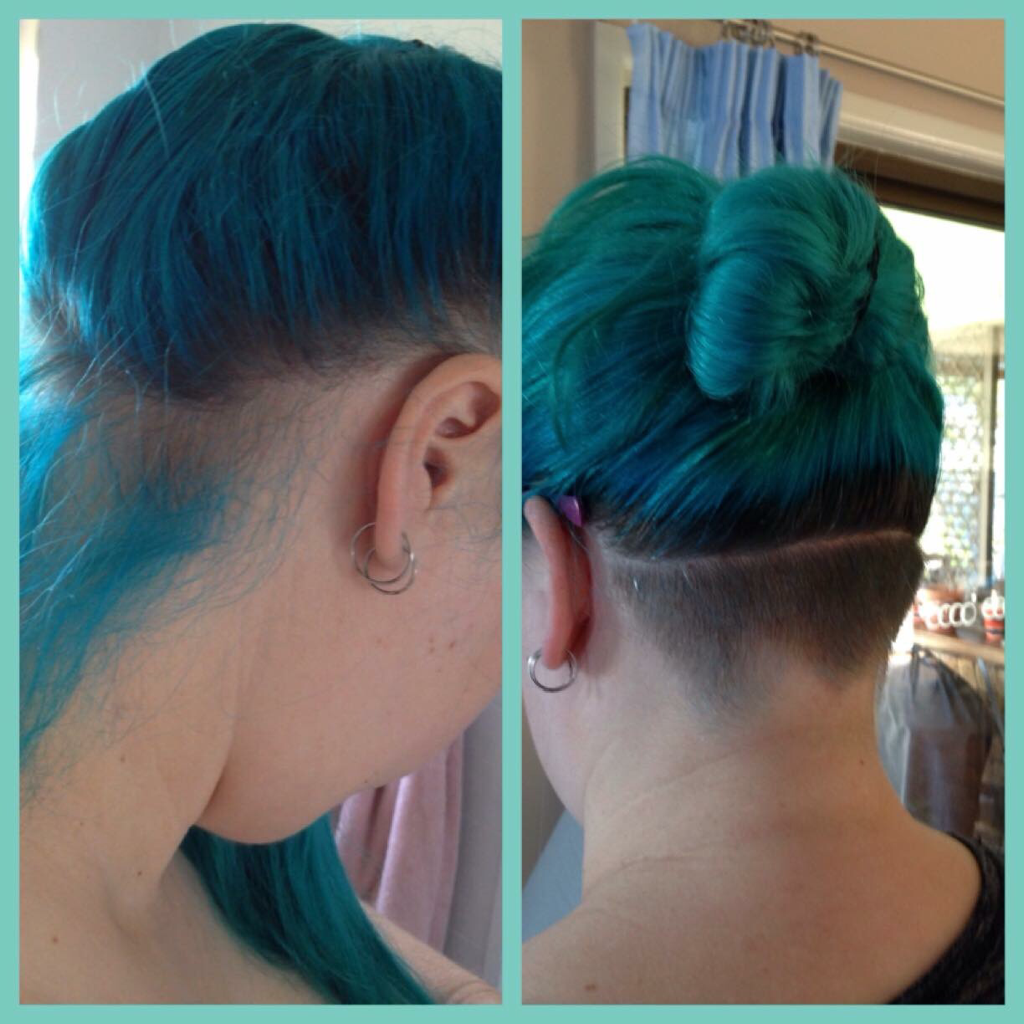 I not afraid to do things to my hair, I know that it will grow back eventually. I am currently growing back an undercut that I got 2 1/2 years ago as after A was born, my hair went nuts at the back. It was always knotty and as I was a baby wearing mum A could also pull on the shorter bits. Off it went! I started growing it back at the start of the year, and it’s already long enough to put up in a pony tail.  Last October I chopped in a fringe because I felt like a change. I love having a fringe, but the upkeep and having to keep it nice just frustrates me.  A myth that actually annoys me about dying hair is that if you bleach your hair, it will stop growing. That’s just not true. Your hair is already dead, bleaching doesn’t stop hair follicles from growing more. The issue I think is that over bleaching hair means that is is more prone to damage. That’s why I only ever bleach the roots, and that will slightly overlap the previous section of bleach. That small overlap on my hair will only be bleached twice EVER. I use coconut oil and/or argan oil on my hair. I just smooth some over the length every morning and night. I also use the coconut oil on Saturday night, just rub it all through my hair and leave it in over night in a bun. I wash it all out on Sunday during my weekly shampoo. Leaves my hair feeling soft and beautiful. I don’t have a problem with split ends.  I rarely use a hair dryer or a flat iron. I think my hair looks awesome flat, but I’m too aware of the damage it will cause so I usually let my hair do it’s not really wavy thing. My hair before I started bleaching. Mousy brown with lots of grey, and a maroon box dye! I live for Crazy Hair Day fundraising days.  I’ll leave you with one of my favourite photos of my hair. 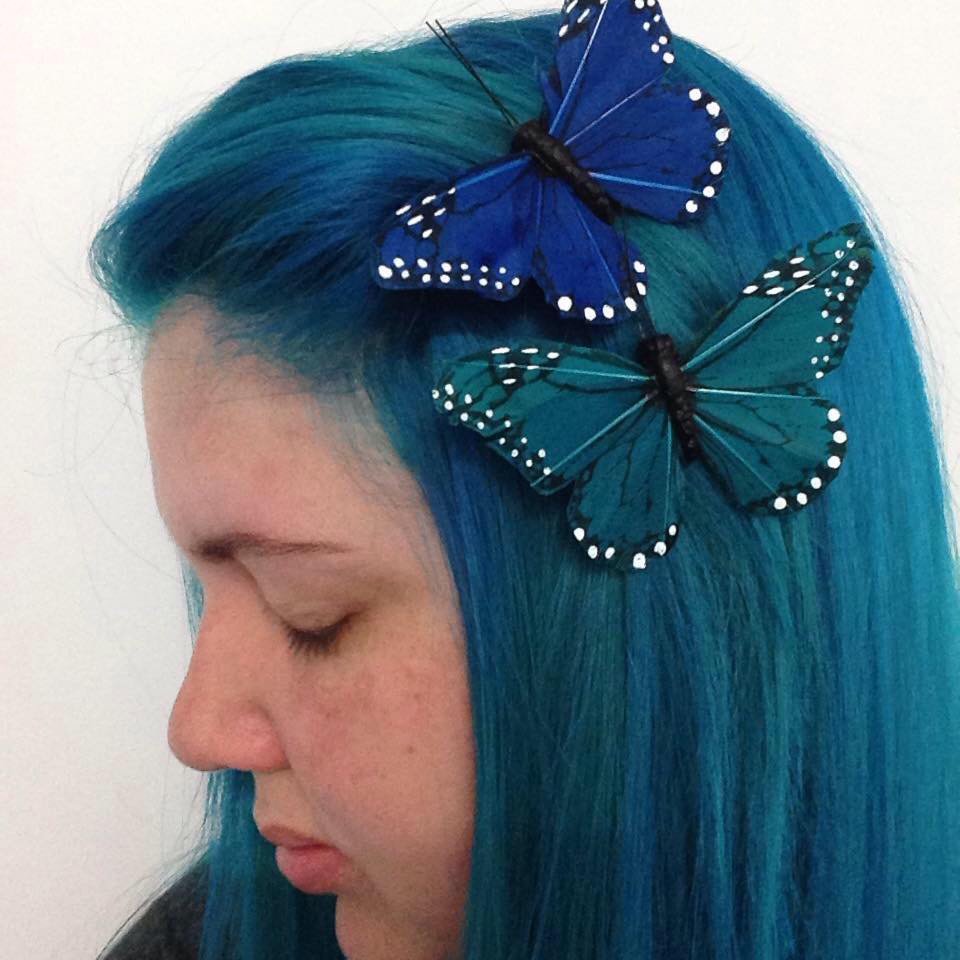 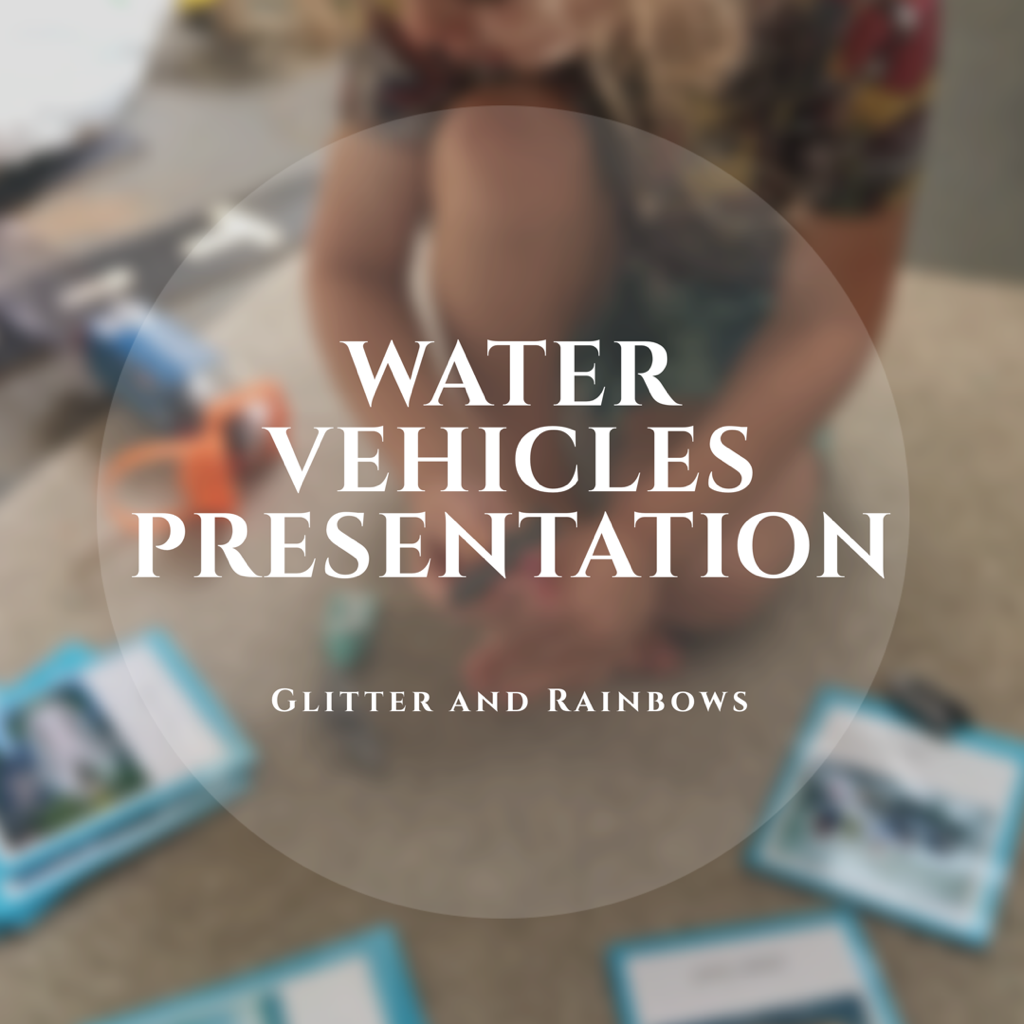 This was a fairly unstructured presentation. I let him loose with the cards and the models, when he didn’t know the name of the vehicle I told him what it was, there were a couple of tough ones there like a wind surfer.  He matched them up with the photos, I read the labels to him.  He has since taken the models into the bath with him to play, so I’ve been able to help him name them while he has played. 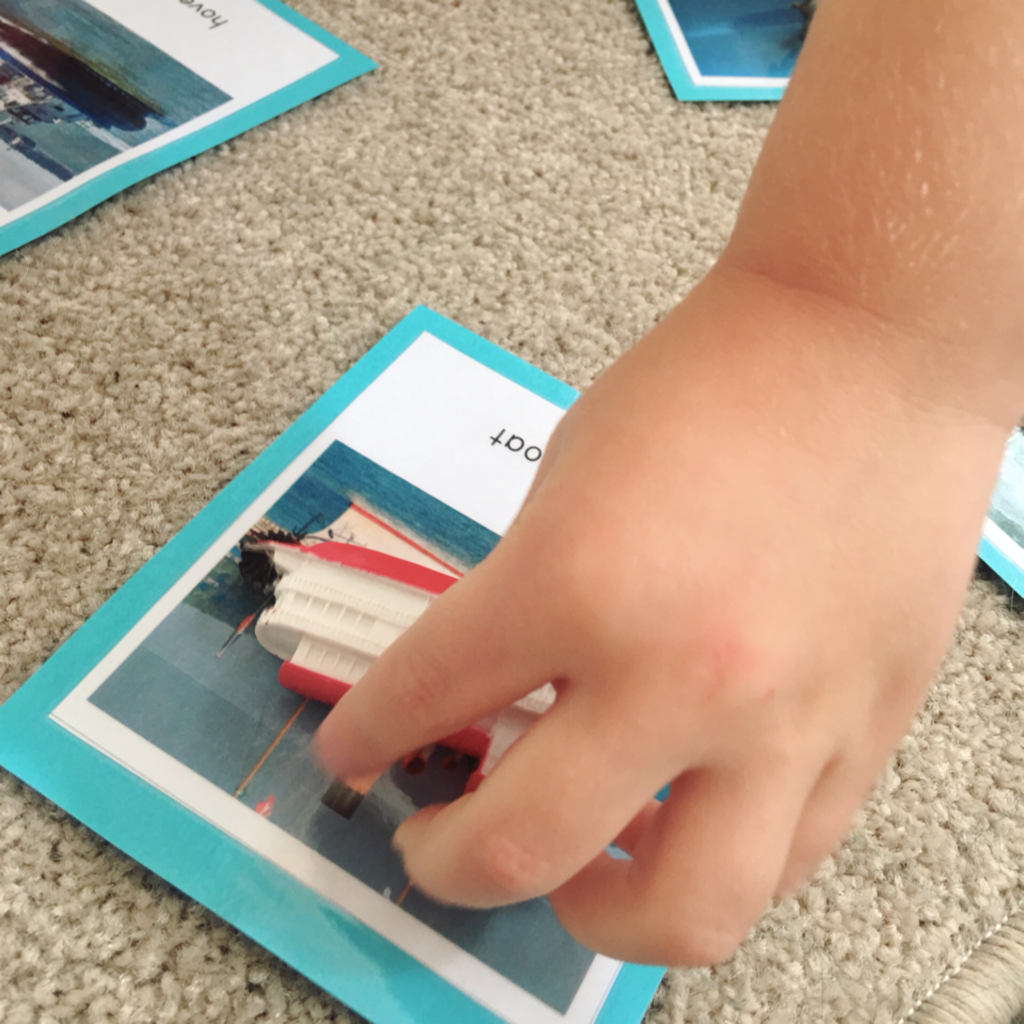 I got this idea from Pinay Homeschooler, please check out this link to see her original post. I also bought her cards from here. 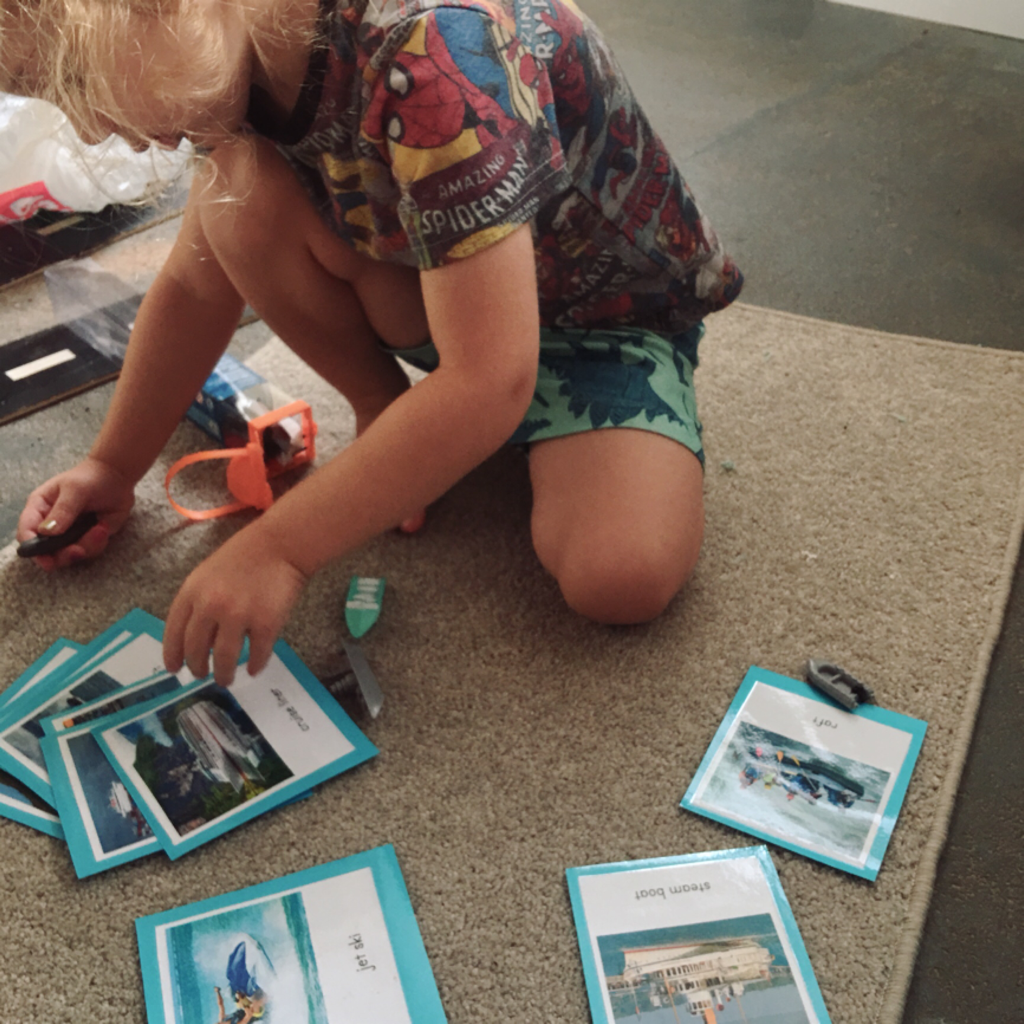 Note that the new editions of the Toobs have vehicles missing, I know that there were left over cards that didn’t match up with our sets. Sorry, I can’t for the life of me remember what they were!
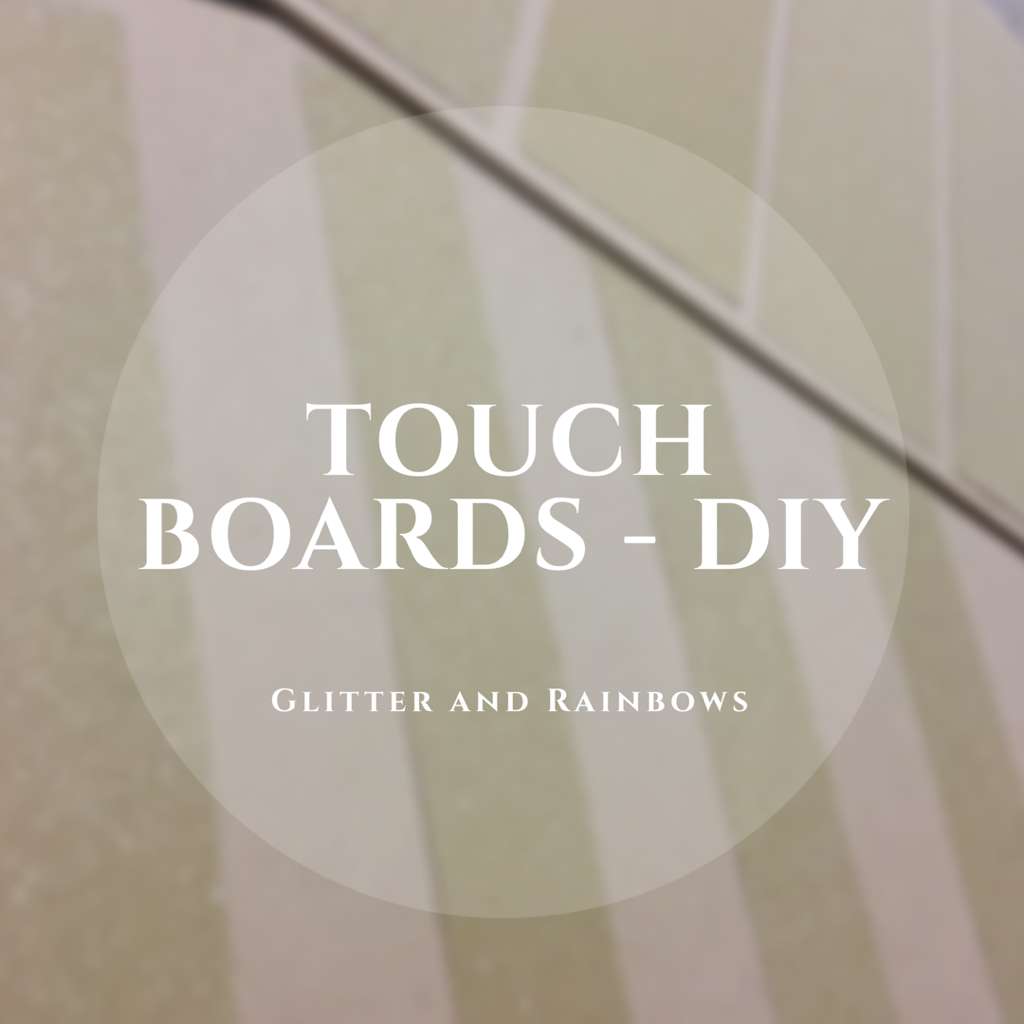 Making a set of touch boards have been in my to do list for a while. I should have had them done ages ago so that when A was keen about touching surfaces I could have had them ready to go. Oh well, I’m sure he’ll still be interested in it just for the newness factor, and as he is still a very tactile person I think he will like them.  To make these I bought a pack of various grade sandpaper for less then $5. It came with a few sheets of each grit, but since I had used the sandpaper for school projects, I was missing a few. In the end I only had enough for four levels of grit rather then the five in a real set. I wanted to make sure I also had enough for the next step in this materials, the touch tablets. 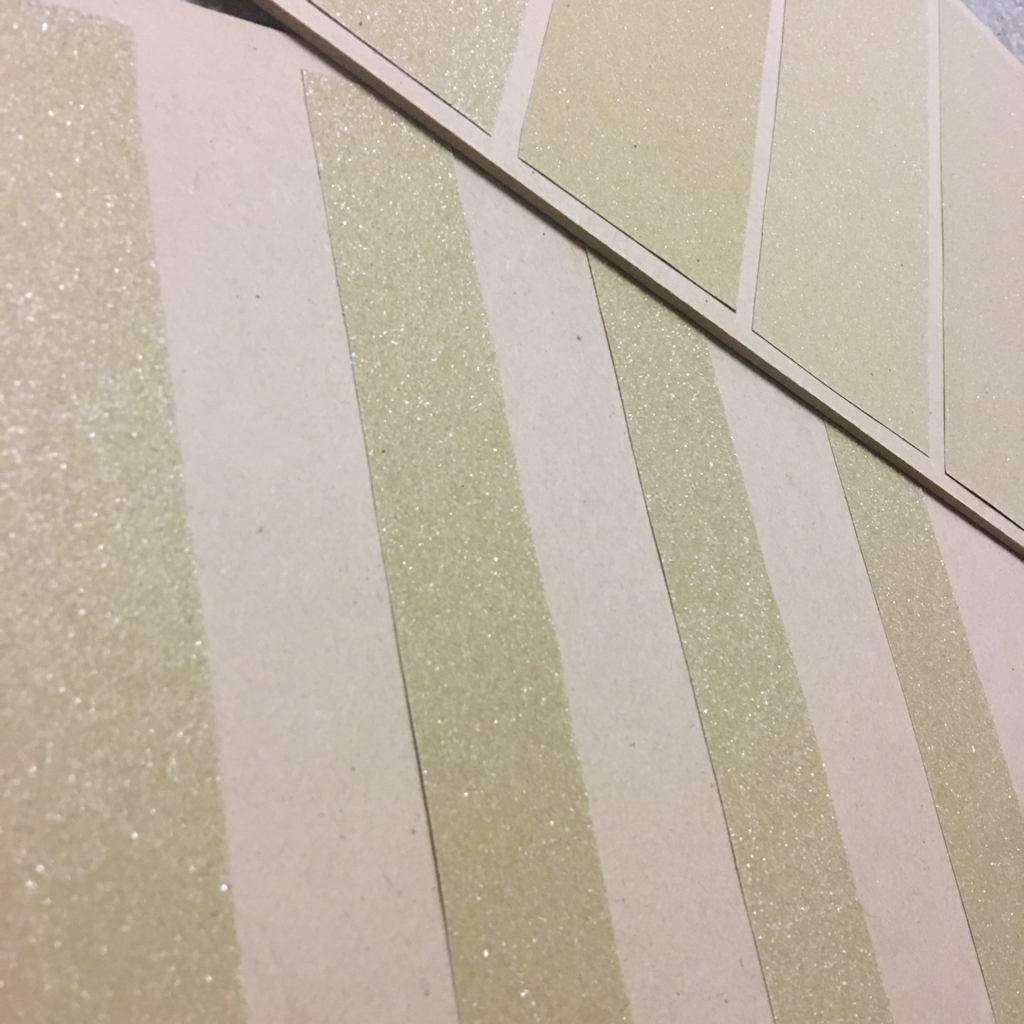 Since I live in the middle of nowhere I relied on eBay for some MDF craft boards - these are placemats. They are a little larger then the actual touch boards you can buy, but for $6.89 total I am not complaining. 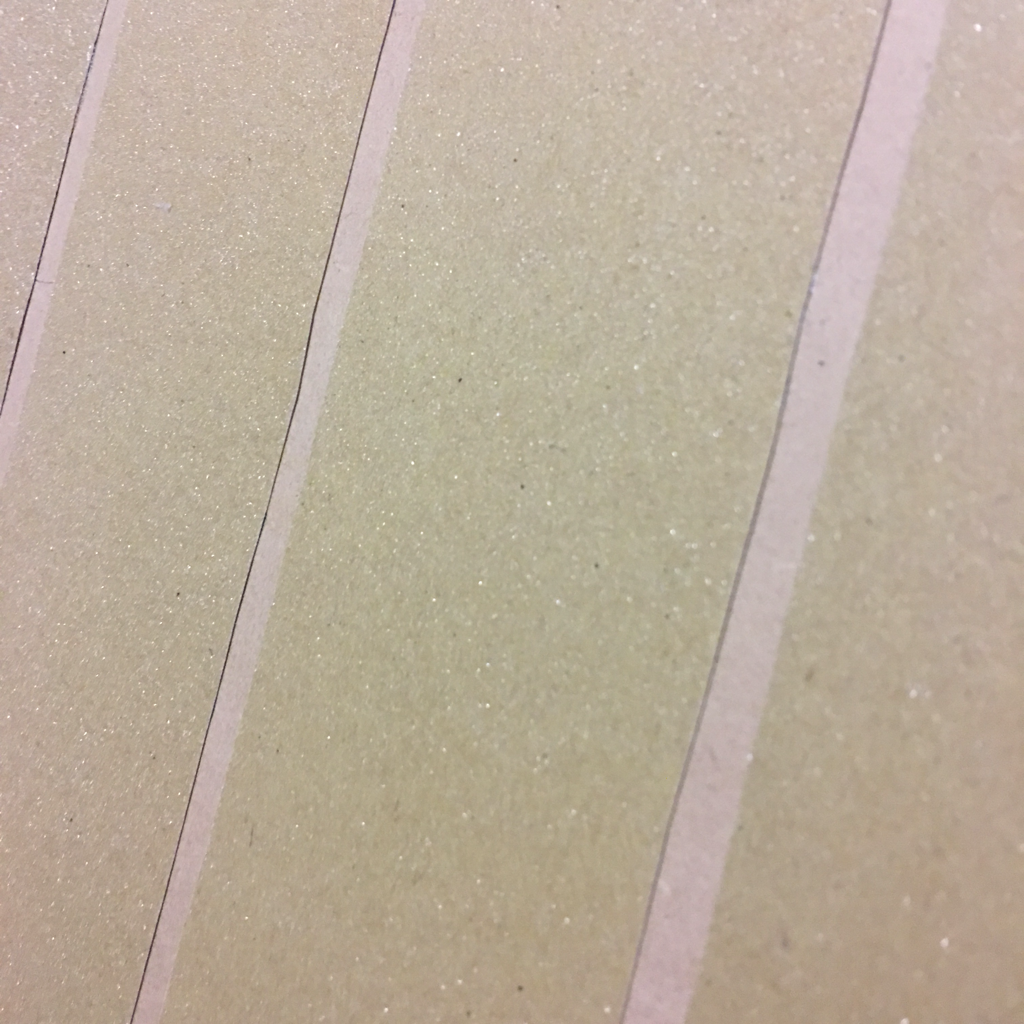 I looked at some photos of various touch boards and used this page from Info Montessori to help me plan mine out. In all honesty it took me longer to find a pair of scissors (seriously we have a brownie who hides scissors and crochet hooks in our house) than it took to work out how to make these. 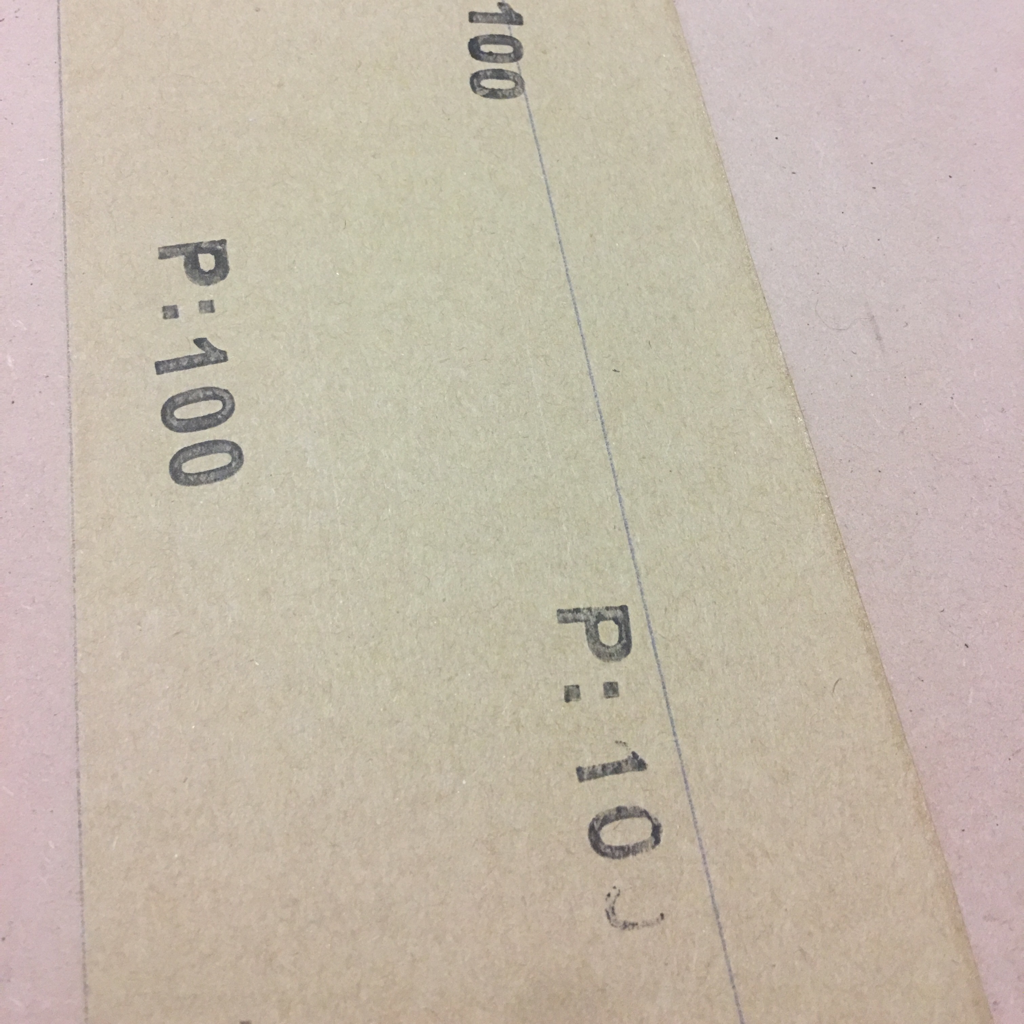 For the first board, I divided the board’s length in half and cut a piece of sandpaper to match. This was from my toughest grit. For the second board, I cut strips of sandpaper the width of my ruler. I trimmed the strips down to size to fit the width of the board. This was all out of my toughest grit. For the third board, I cut strips of sandpaper twice the width of my ruler, one of each grit. I then trimmed a little bit off one side and an end so that they could fit better. 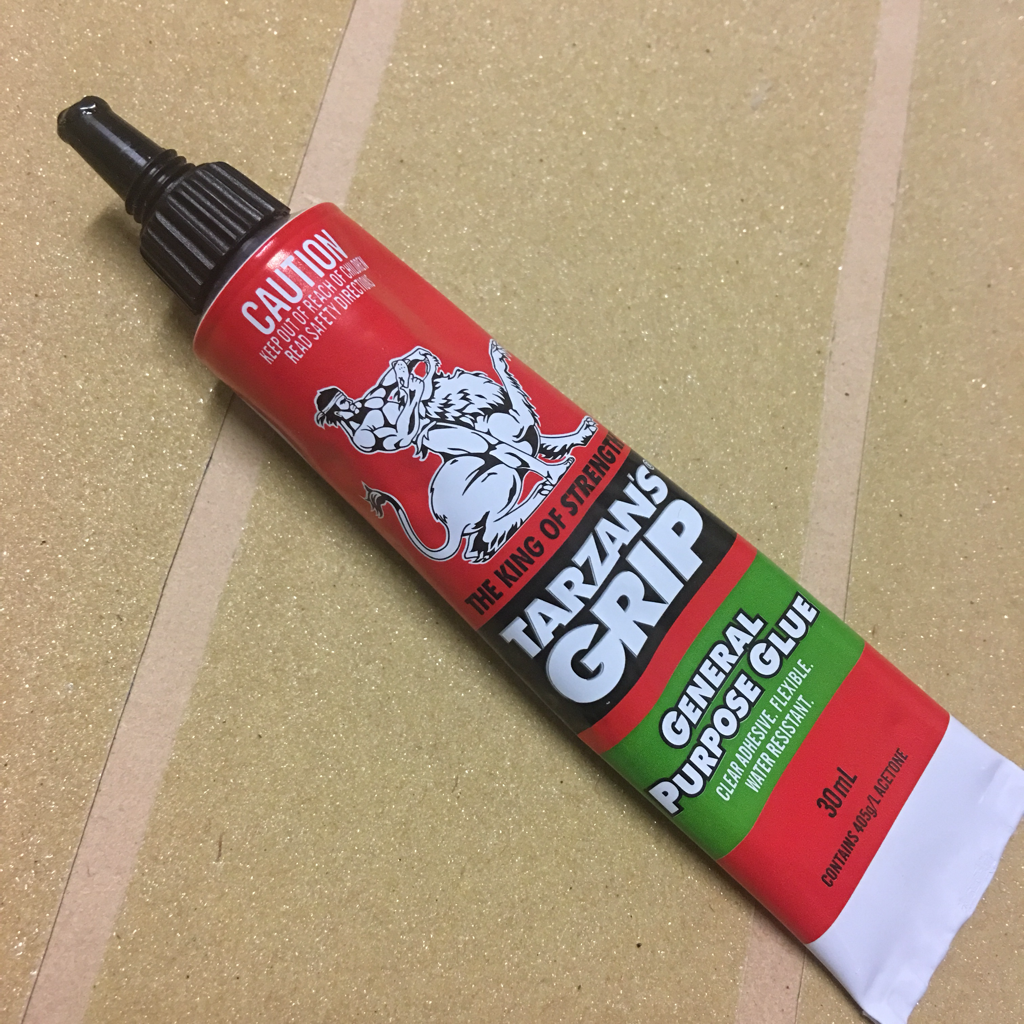 To glue it in I used my favourite glue, ‘Tarzan’s Grip’. I tried to run it along the edges so that the edges wouldn’t peel up when used by little fingers.
I think they look great!  This isn’t a long post, but since we just picked two marigolds from our garden our little display looked extra cute! 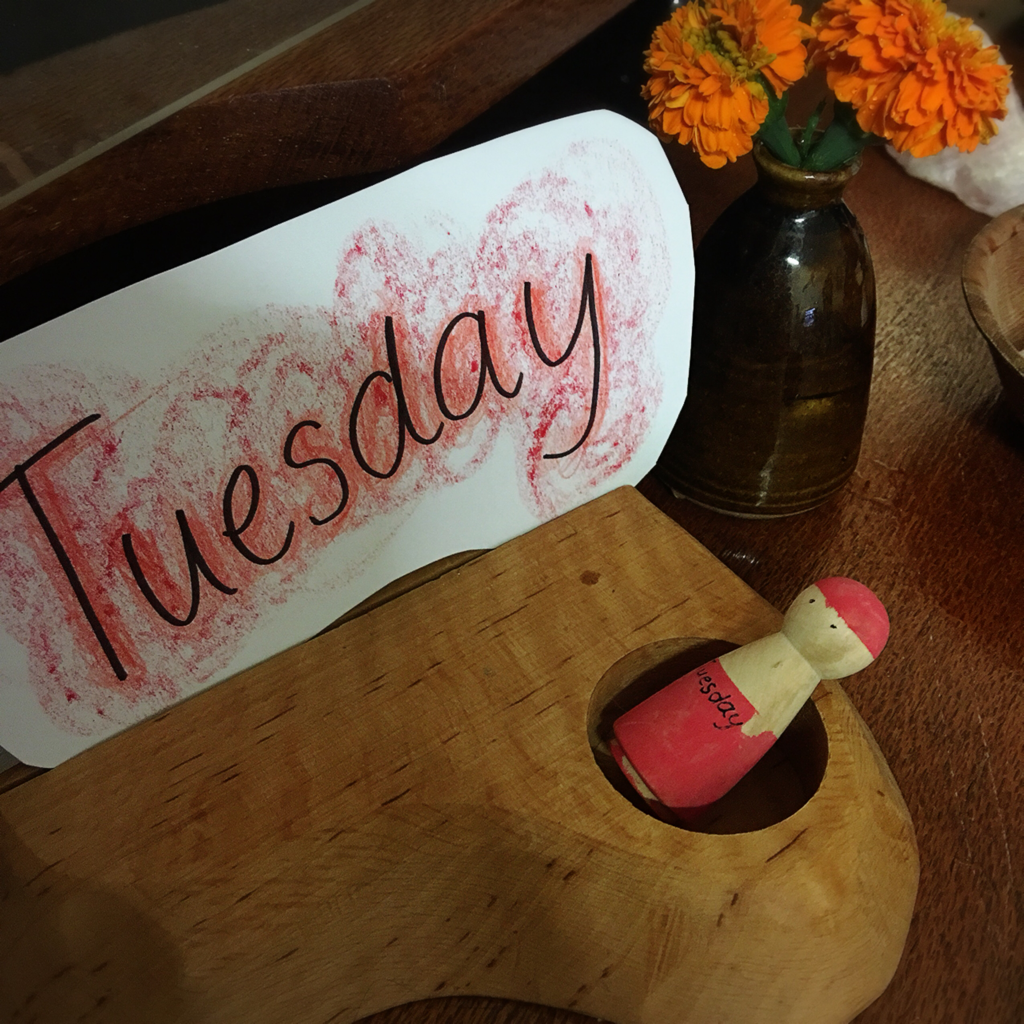 Our ‘days of the week’ gnomes were painted by us a while ago, but A seems really interested in knowing what the day is at the moment. Before this they have been played with, and they look a little worse for wear but that’s what makes them extra special. 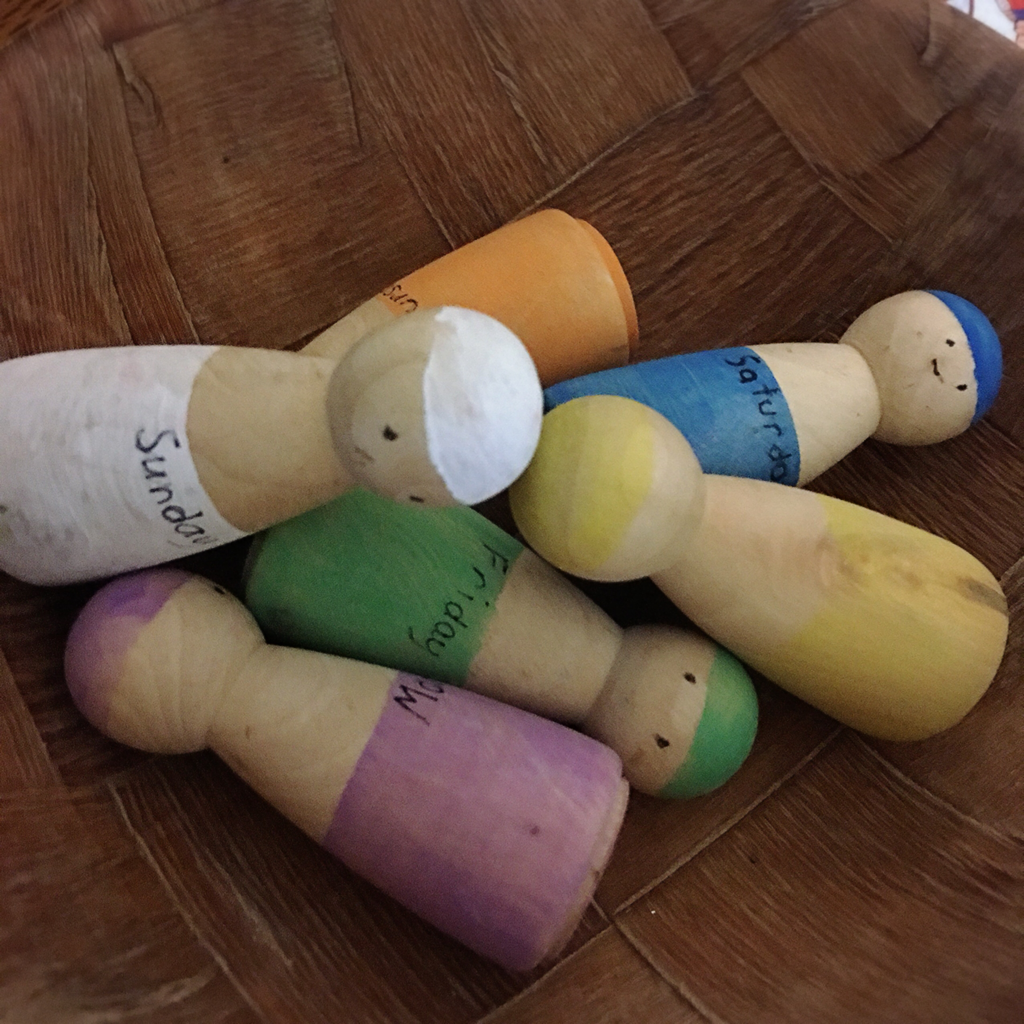 I love this aspect of Waldorf education. Each day of the week has it’s own colour, so it’s really helping A understand the weekly rhythm.
I bought the holder a couple of years ago from Dragonfly Toys from here.  I had been talking to a friend about travel or world schooling and she mentioned that there were so many amazing things in our own small community that others don’t get to see. I agree with her - our little town is pretty fantastic. So in an effort to get out of the house and beyond the fence we walked the two whole blocks to our local state park. The walk there was fun as well as we walked past a neighbor feeding her flock of guineafowl. I figured if some teens were there we could say hello - I know them all anyway - and watch them skate or ride. 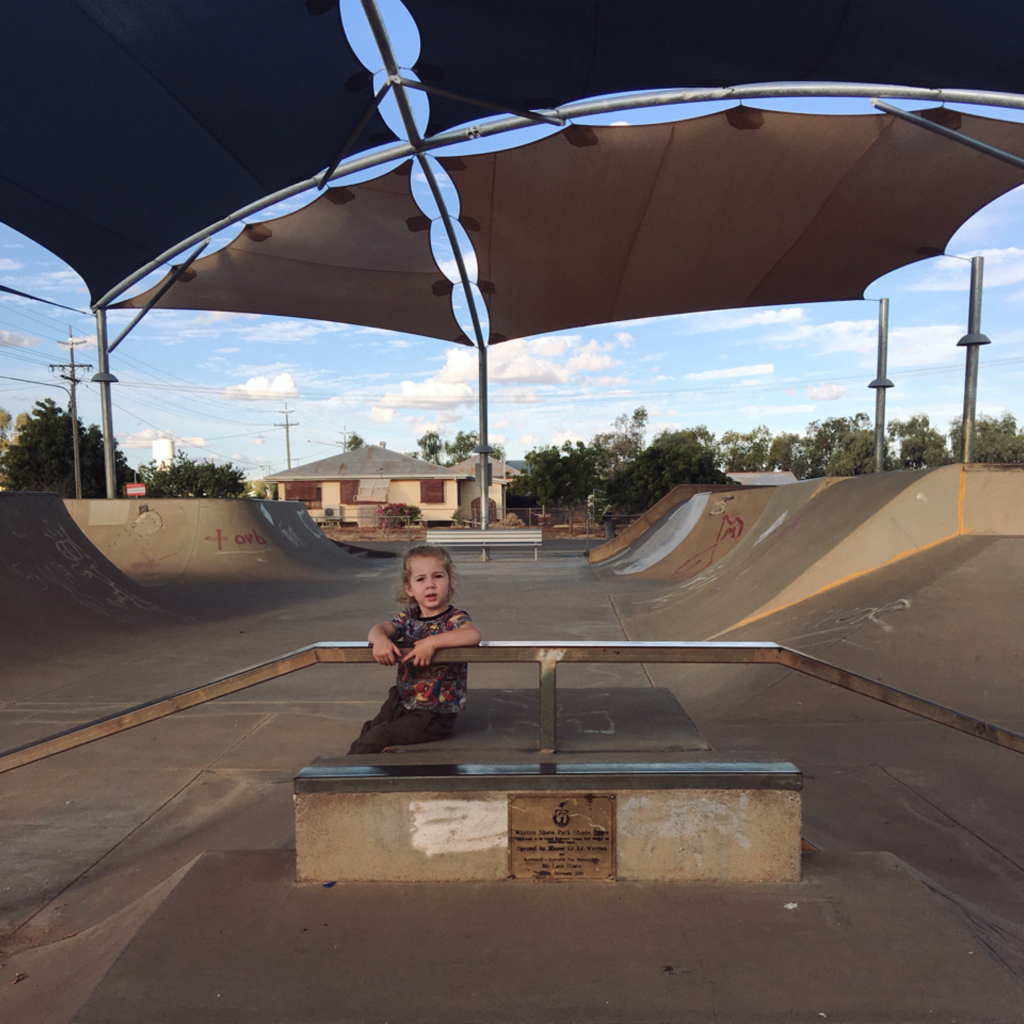 Turns out the park was empty so A had the run of it. He loved it! 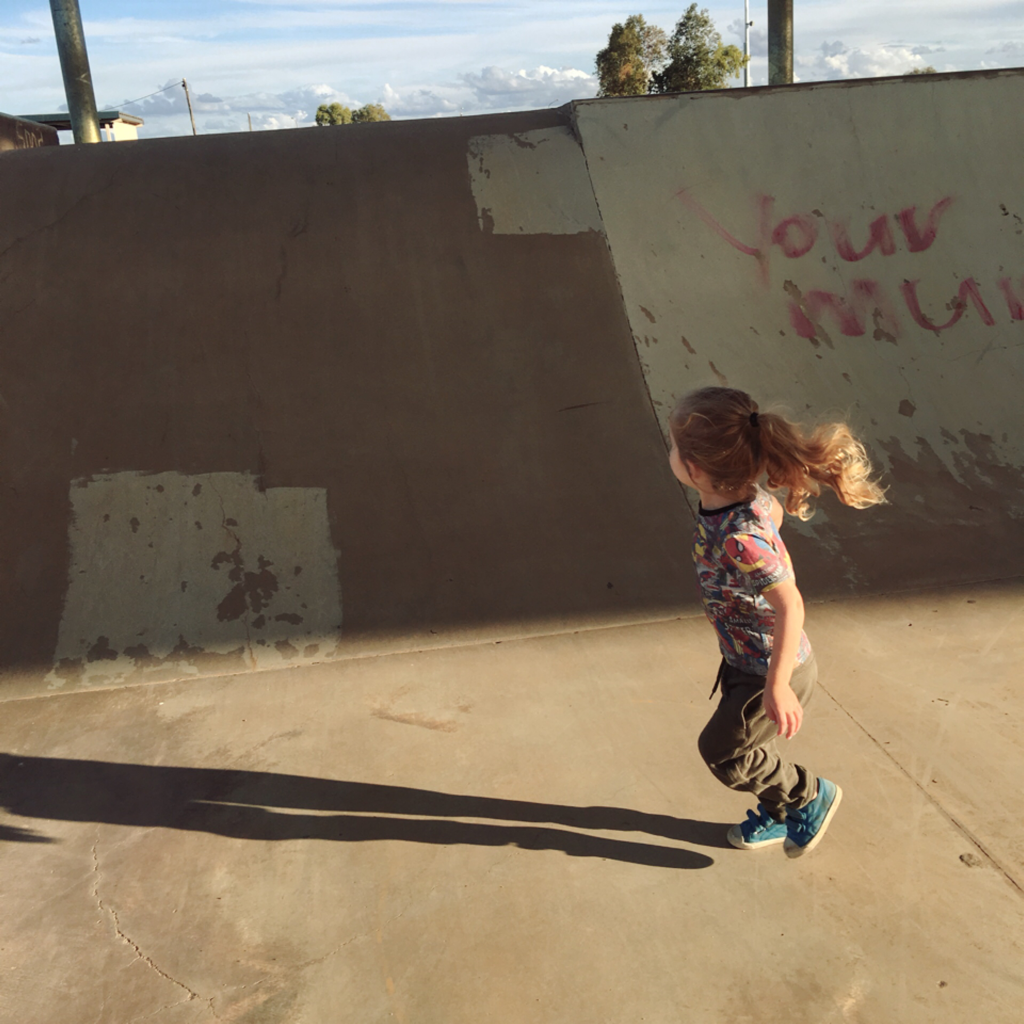 I laid down some ground rules about staying away from the high edges and the steep sections but other then that he was free to roam.  I even got him to roll down the hill, once. He didn’t want to leave, so we’ll have to head back there soon.  |
AuthorHi, I'm Pamela. A nail crazy lady with green hair. I live in outback Queensland with my toddler and my husband. I love books, writing and crafting. For more info about me go to my 'About' page. Archives
March 2018
Categories
All
|


 RSS Feed
